Search found 24 matches

by JUSTINIAN
Thu Nov 17, 2016 6:18 pm
Forum: Public Access Board
Topic: Building an ROTS Vader
Replies: 45
Views: 83064

Re: Building an ROTS Vader

Just finished with the chrome paint on the coin slots and rocker switches. The chest box is nearing completion.

Image
Image
by JUSTINIAN
Tue Nov 15, 2016 11:35 pm
Forum: Public Access Board
Topic: Building an ROTS Vader
Replies: 45
Views: 83064

Re: Building an ROTS Vader

Finally laying down some paint. A nice gloss black makes things look good. Some dust got on it, but that's an easy fix in the morning.

Image
Image
Image
by JUSTINIAN
Thu Nov 10, 2016 9:17 pm
Forum: Public Access Board
Topic: Building an ROTS Vader
Replies: 45
Views: 83064

Re: Building an ROTS Vader

NegativeEleven wrote:I know you'd rather make em yourself, but I just got rid of a ROTS chest box and belt boxes. I thought I told you I had those and was willing to let em go cheap. I believe they were all from a Supreme Rubies kit, but the chest box had new electronics for a correct lighting pattern.

Hope to see you trooping soon. Good luck.
I'm too much of a perfectionist. I would have ended up fixing almost every part for ultra accuracy. And I already pretty much had these just about done.

Update time! The chest box mold is complete, and the casting came out perfect.
Image
Image

The next part up is the coin slots. Many steps, and super tedious, but worth it in the end. I started by cutting all of the layers out of acrylic. And then glued them together.
Image
Image

Then I smothered them in Bondo, and then sanded them down to the angled edge.
Image
Image

Then a quick pass of spot putty, and a fine sand.
Image

And then the final coinslot in primer.
Image

I'll start the mold for those in the morning.
by JUSTINIAN
Wed Nov 09, 2016 11:43 pm
Forum: Public Access Board
Topic: Phasma WIP
Replies: 17
Views: 32005

Re: Phasma WIP

Very nice work. The blaster turned out good. It's one of my kits.
by JUSTINIAN
Wed Nov 09, 2016 2:19 pm
Forum: Public Access Board
Topic: Building an ROTS Vader
Replies: 45
Views: 83064

Re: Building an ROTS Vader

This project got put on hold for a bit, but I really want to get it completely finished and approved soon.

I was never completely happy with the belt boxes, and thought they were a little too big. I did some looking around, and found some Hammond project boxes that were a much better size. I used my laser to cut out the exact same hole pattern as before.

Image

And a size comparison with my old set.
Image

I'll be painting those later today.

I also decided to finish off the chest box. I added some support details, so that I can screw on a back plate.
Image

Then made the mold for the chest box
Image

Once that cures, I can flip it over and pour the other half of the silicone.
by JUSTINIAN
Tue Jan 05, 2016 2:22 pm
Forum: Public Access Board
Topic: Building an ROTS Vader
Replies: 45
Views: 83064

Re: Building an ROTS Vader

Not really sure. I need to fix a few things, and mold the chest and belt boxes.

The biggest holdup is the cape. I had to send this one back to my buddy in Colorado. It may be a month or so before I can get another set.
by JUSTINIAN
Fri Dec 18, 2015 6:09 pm
Forum: Public Access Board
Topic: Building an ROTS Vader
Replies: 45
Views: 83064

Re: Building an ROTS Vader

Thanks Alex.

Big update. I was able to get the chest box wired up. I had a buddy do programming to make the coin slots blink in the right pattern. I ran out of time, and wasn't able to get the red in the coin slots, but that's not super noticeable for the weekend.
Image

Belt boxes also have the wiring done.
Image
Image

And a finished pic of the helmet and chest.
Image

I also got a cheap MP3 player, and have the breathing loop running into my Aker. It really adds to the realism.
Image

It was a mad rush to get everything finished for the premier last night, but I was able to get it working. This was my fisrt suit up, and overall it went well. I will definitely need to adjust things after the weekend though. Vader was a huge hit at the theater. I am going tonight as well.
Image
by JUSTINIAN
Thu Dec 17, 2015 9:58 am
Forum: Public Access Board
Topic: Building an ROTS Vader
Replies: 45
Views: 83064

Re: Building an ROTS Vader

silverBoyd wrote:WOW! Your paint job is amazing. Love the shine on those parts. That's how shiny I want to get my RotJ Royal Guard helmet.

The ability to fabricate a lot of these Vader pieces is impressive. You've done a great job. The laser cutter is probably a fun tool to have. I'd love to own one one day. Keep up the great work. I look forward to having you in our ranks.
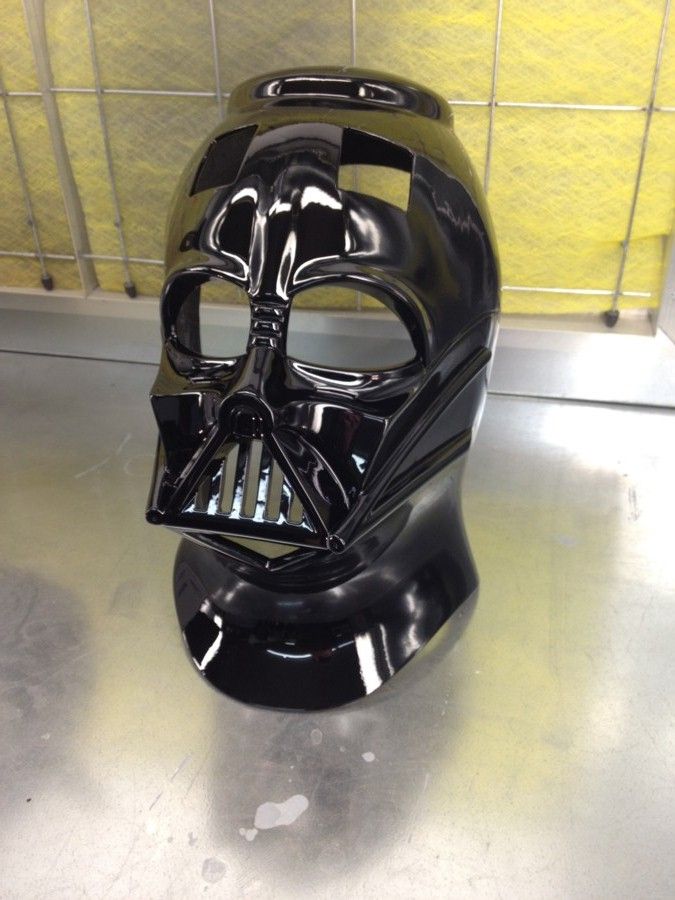
Thanks. I have been painting for many years, but the trick is using the right kind of paints. I love using my laser. It is super useful, but very expensive.
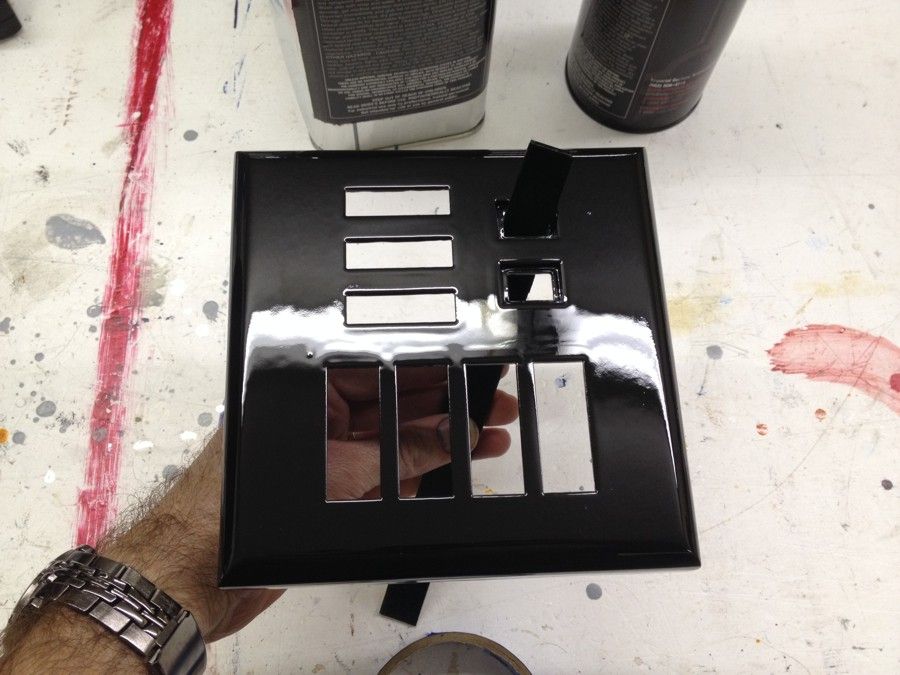
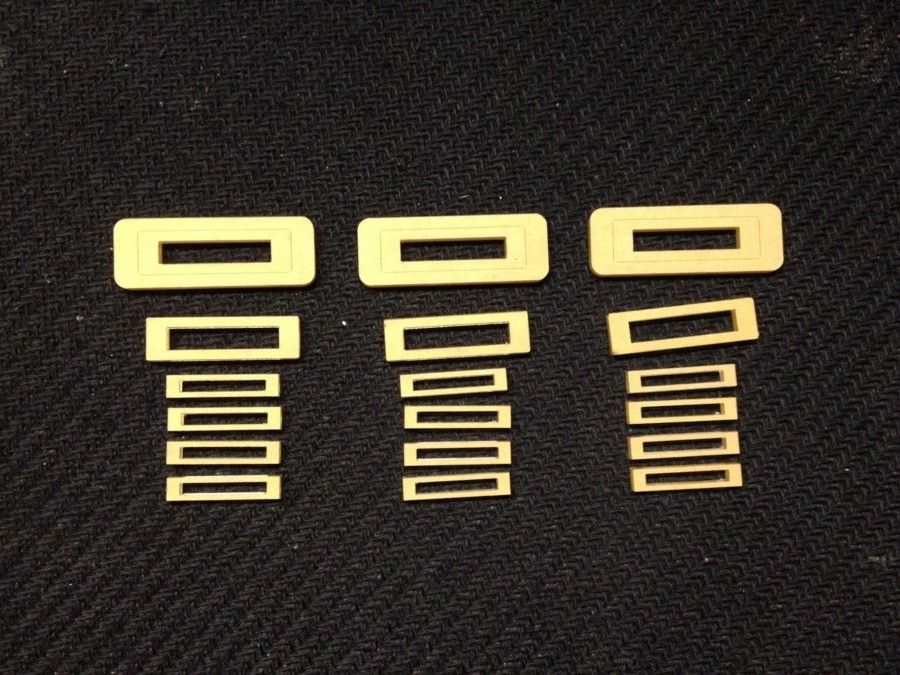
Another update.

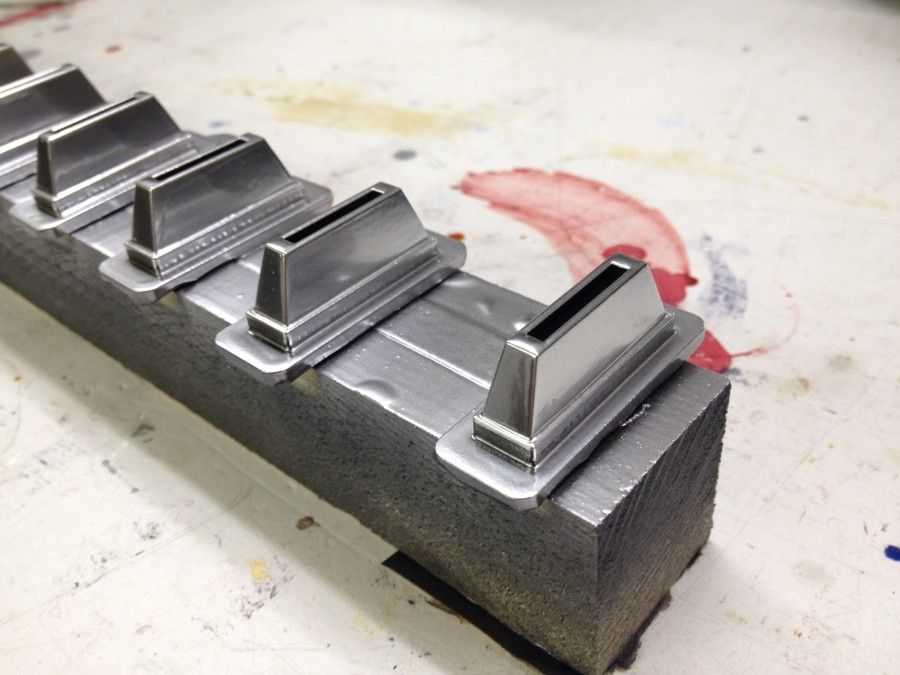
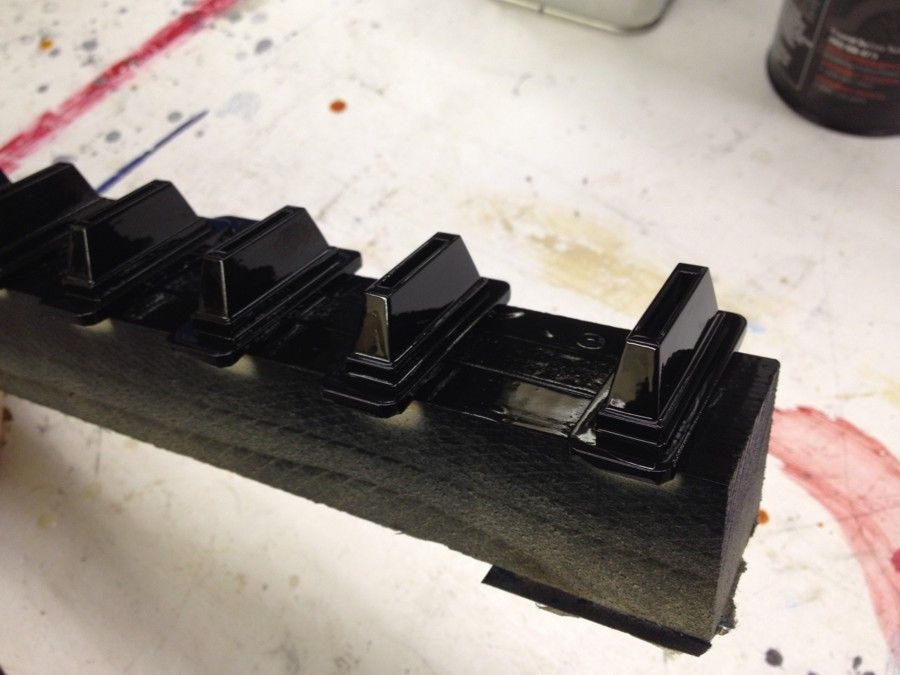
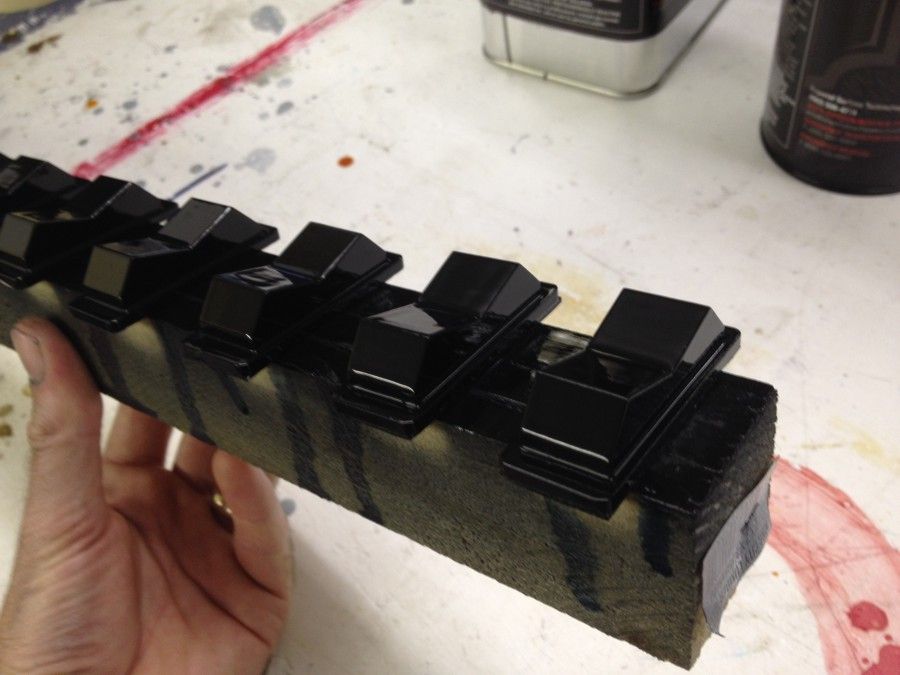
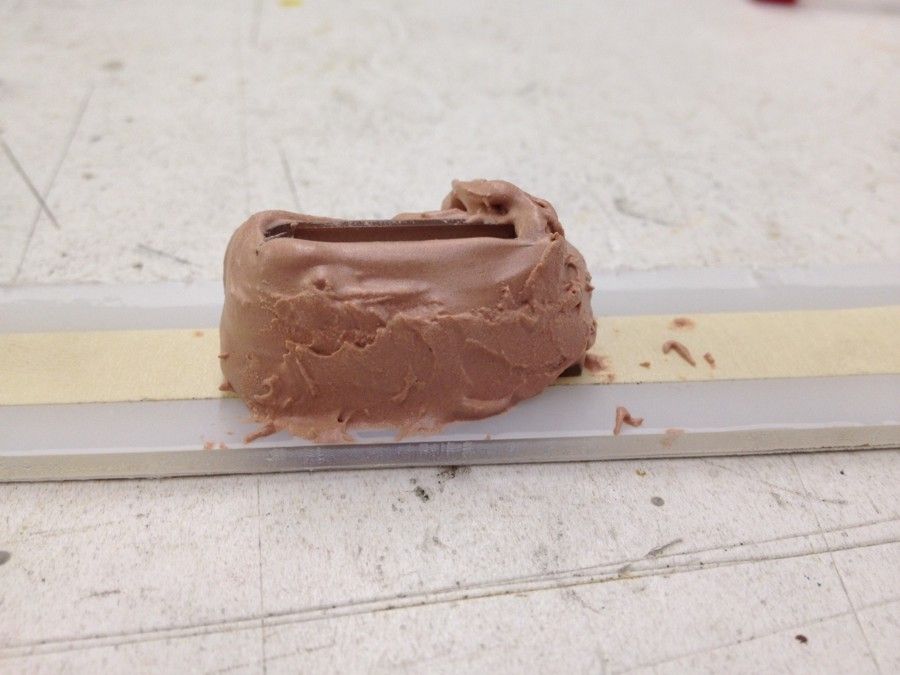
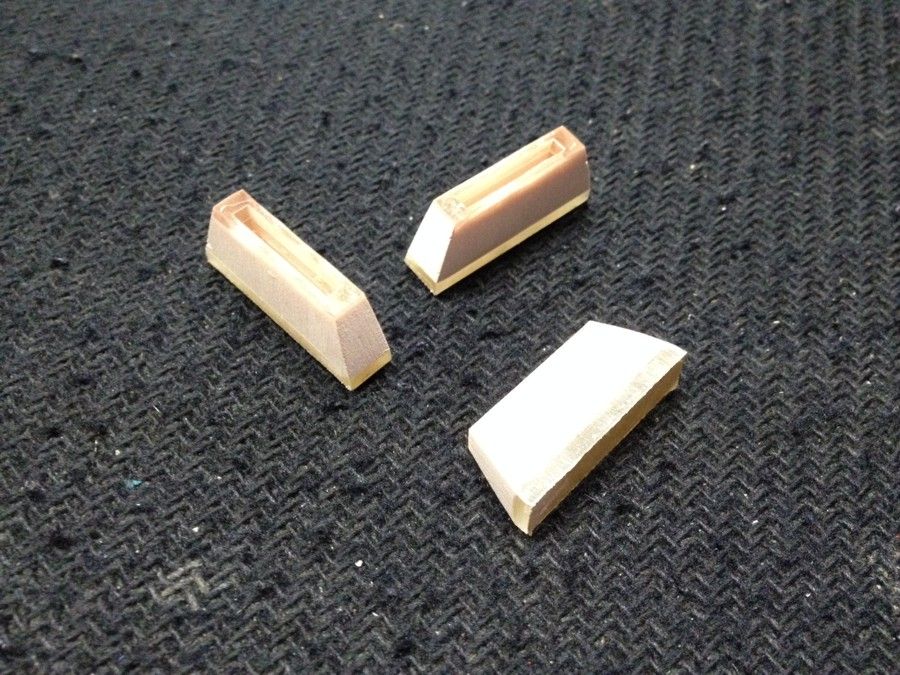
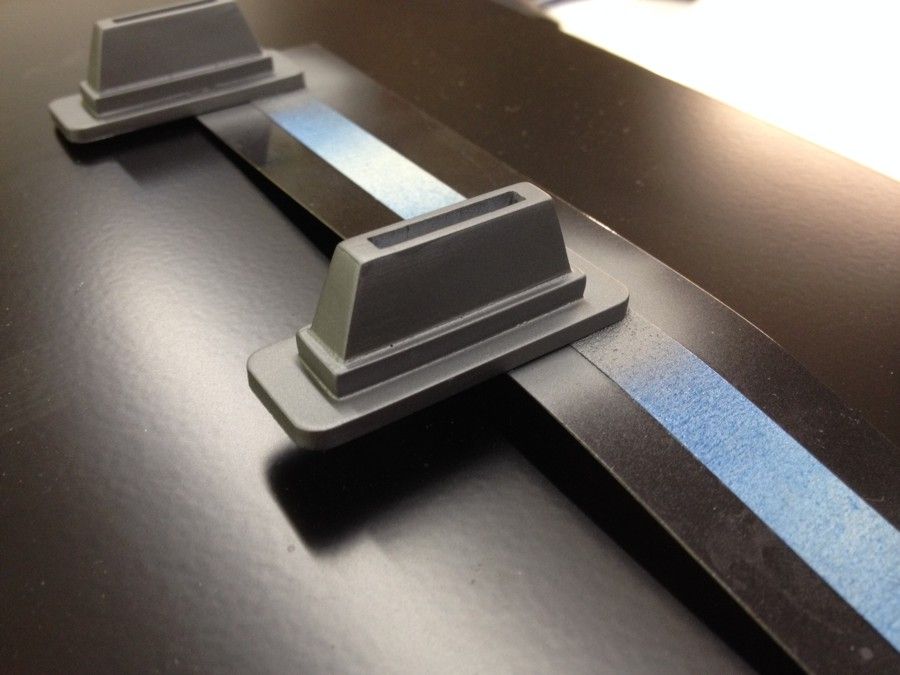
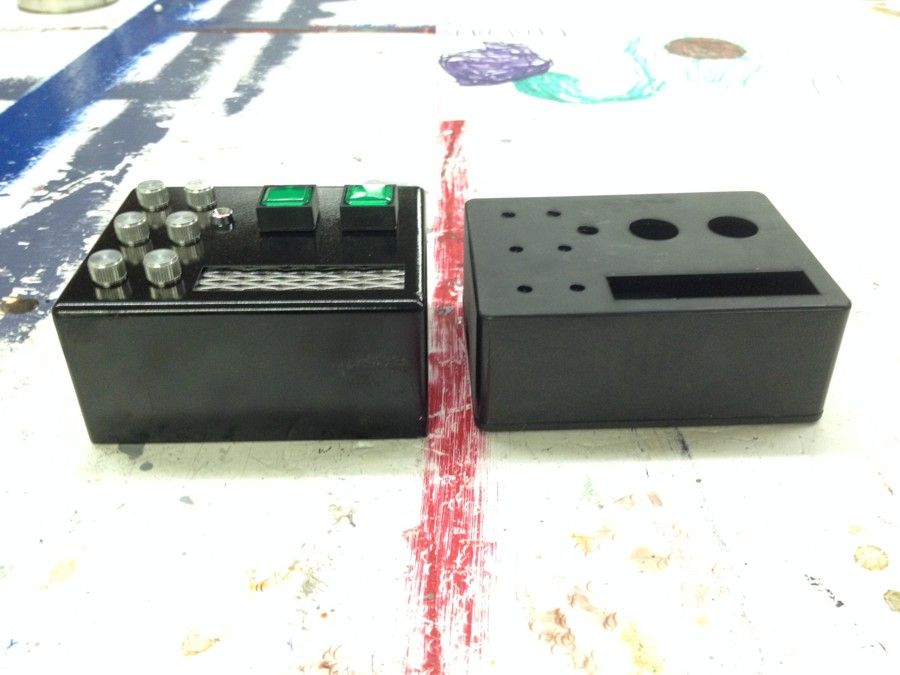
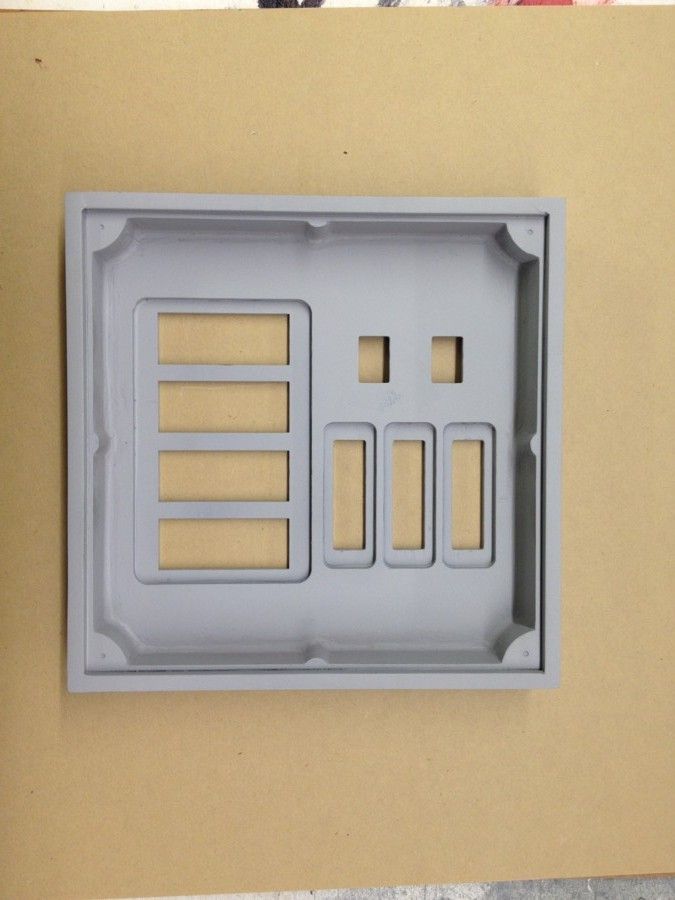
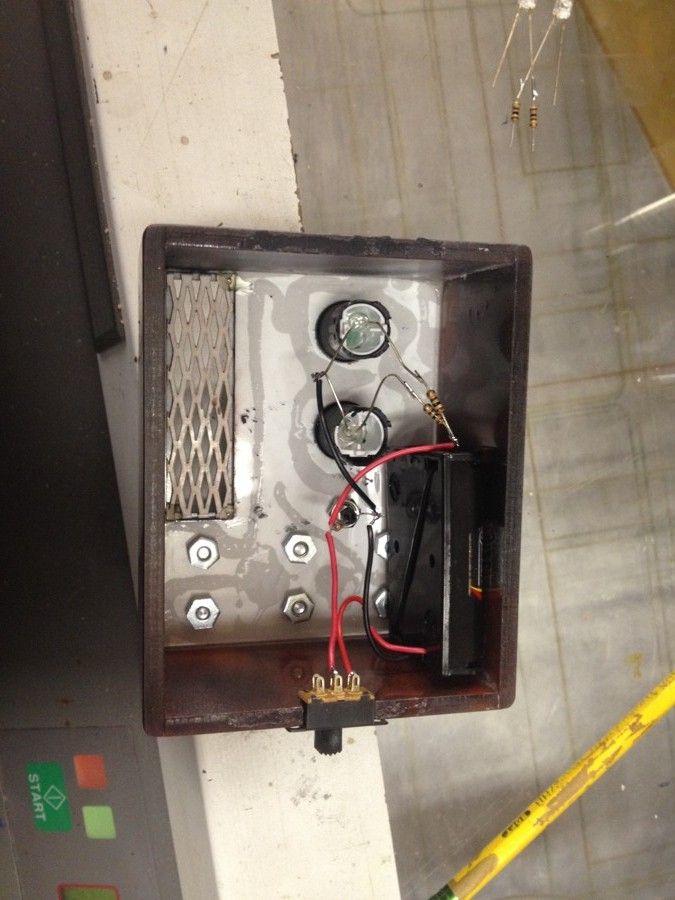
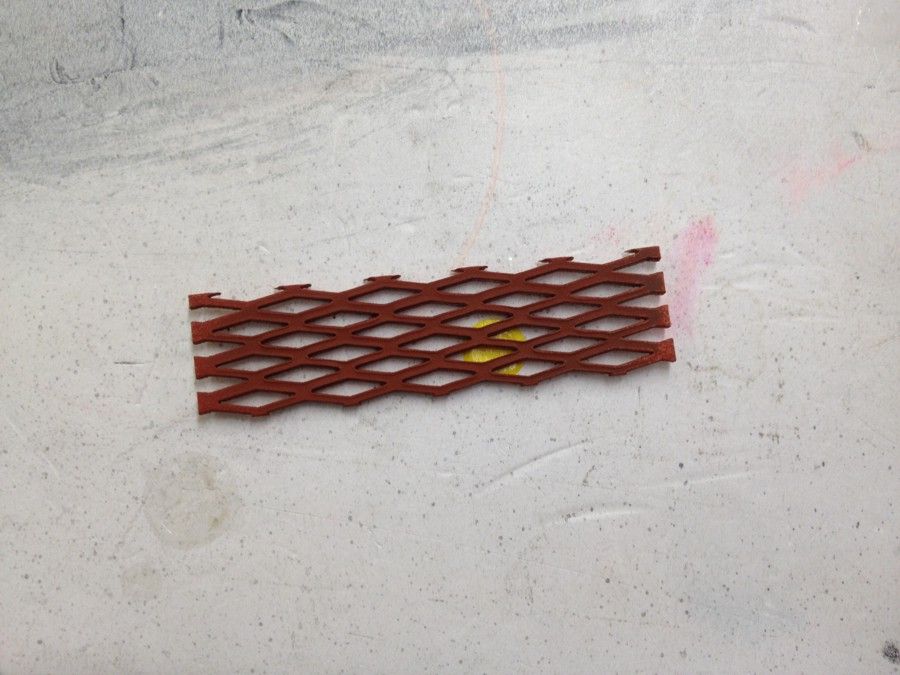
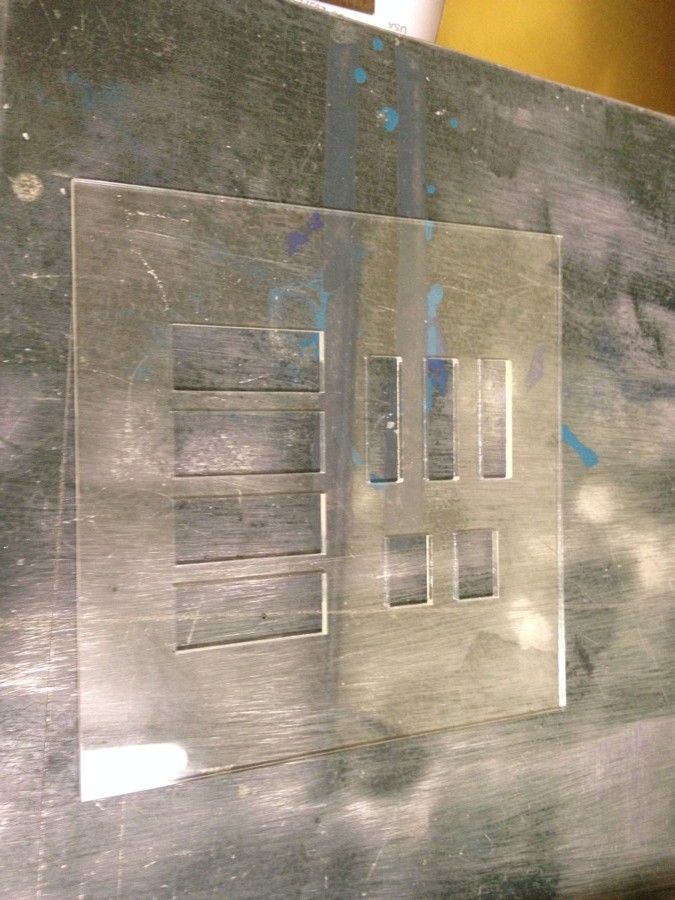
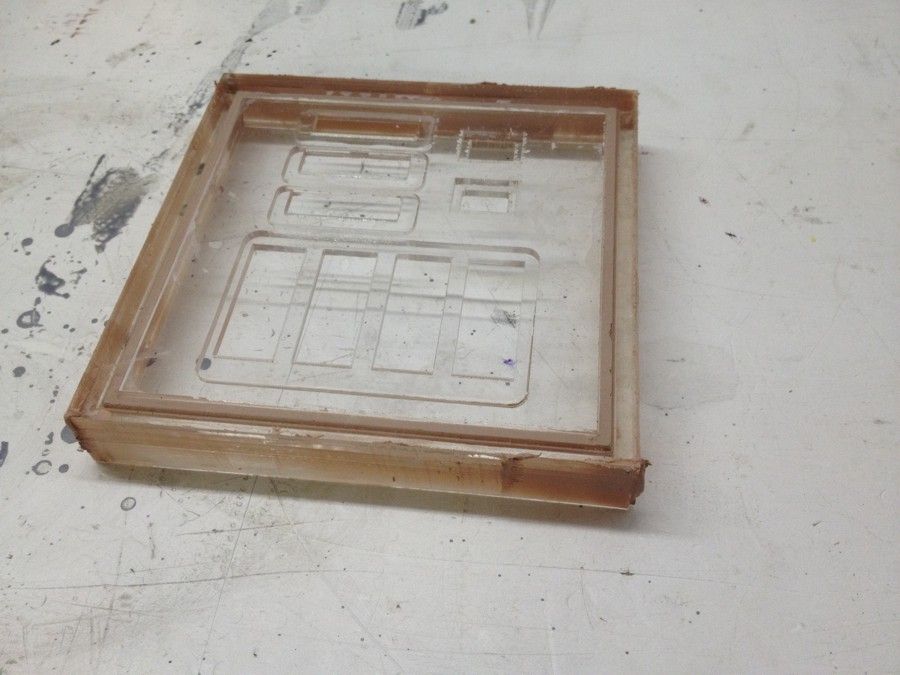
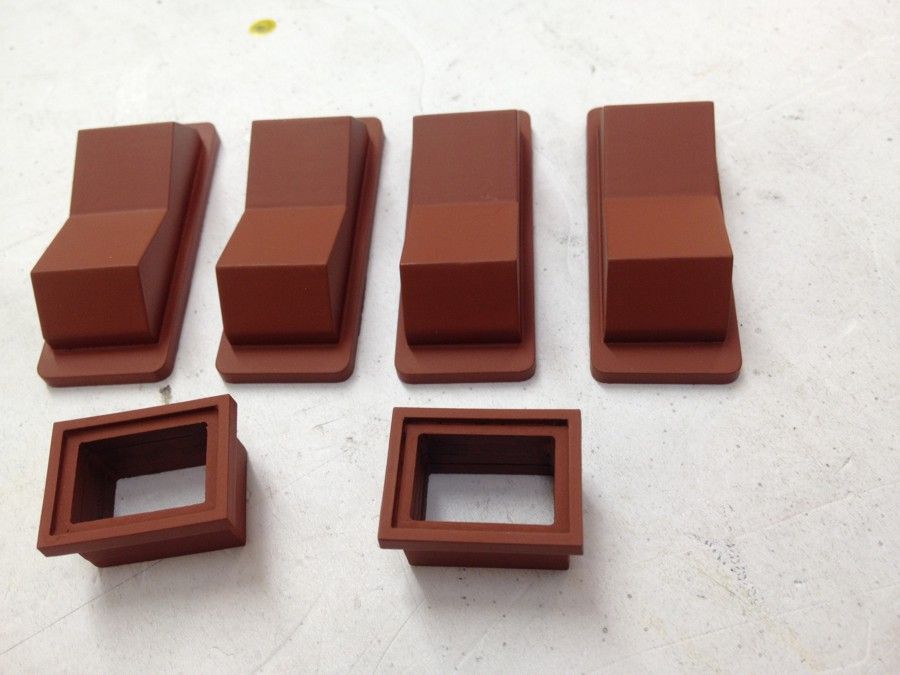
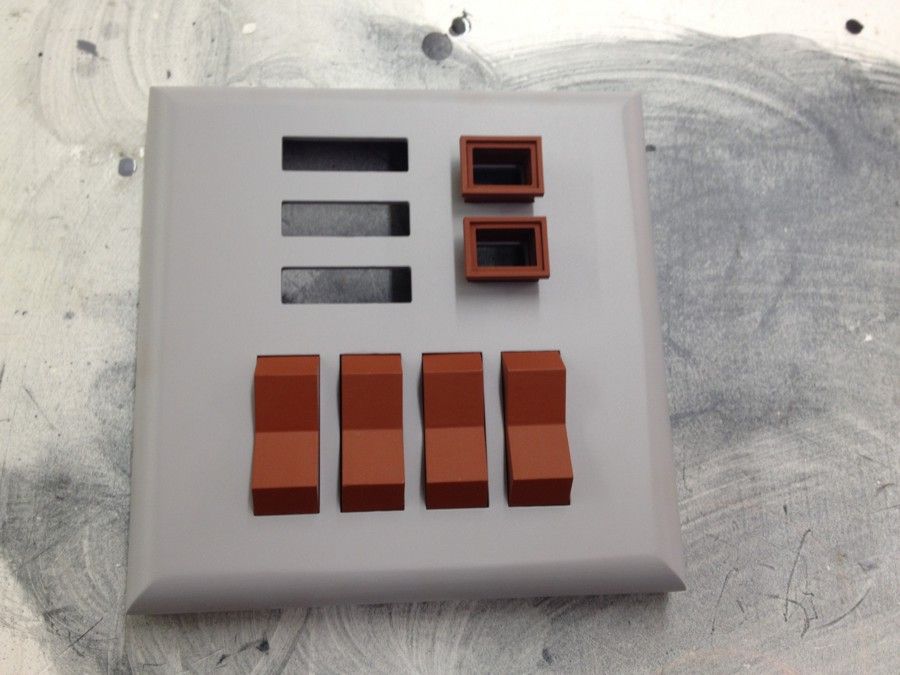
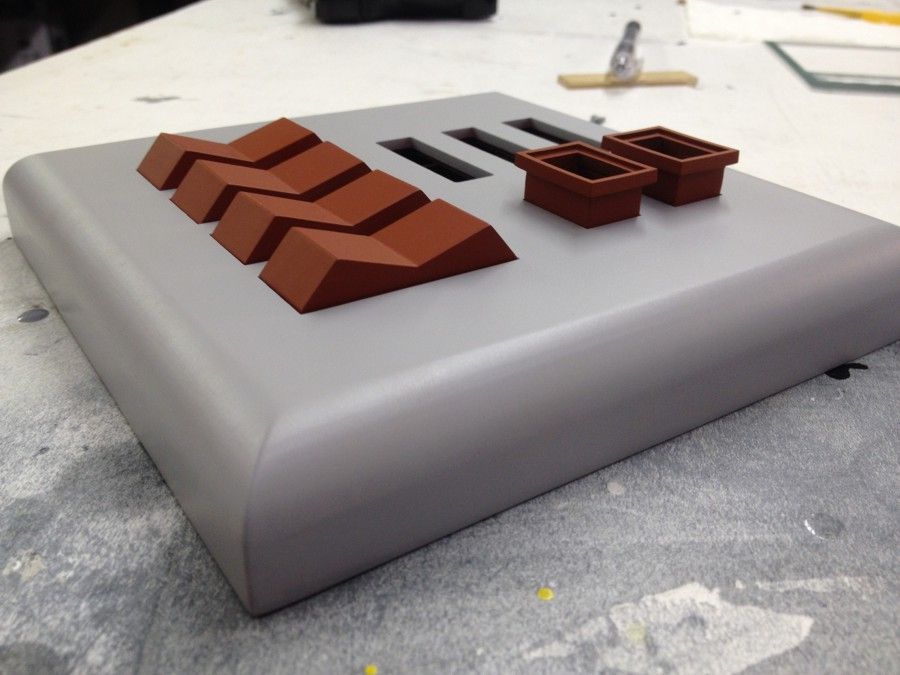
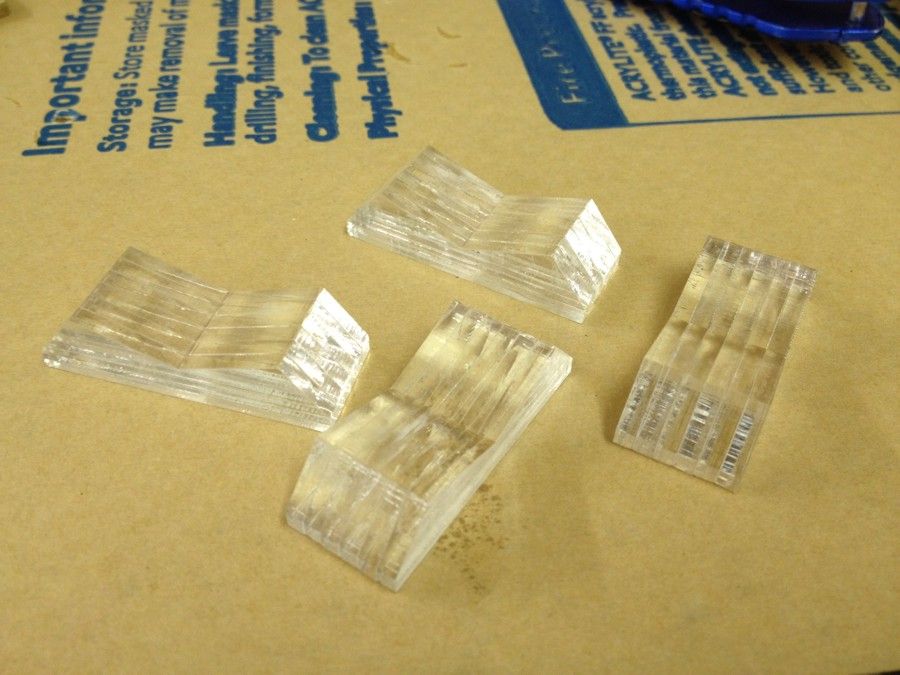
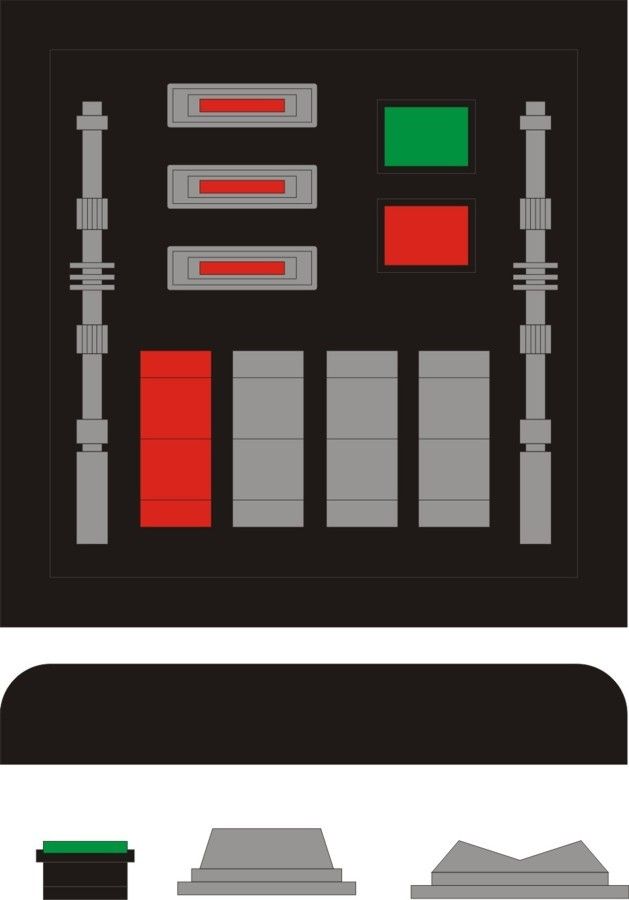
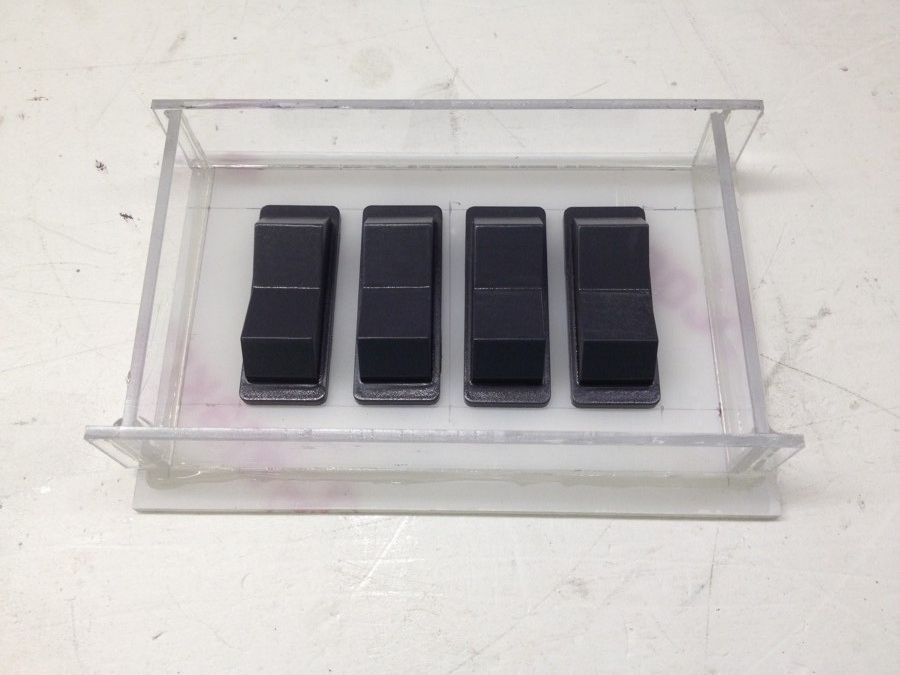
I went ahead and made a mold for the rocker switches. Here is the box.
Image

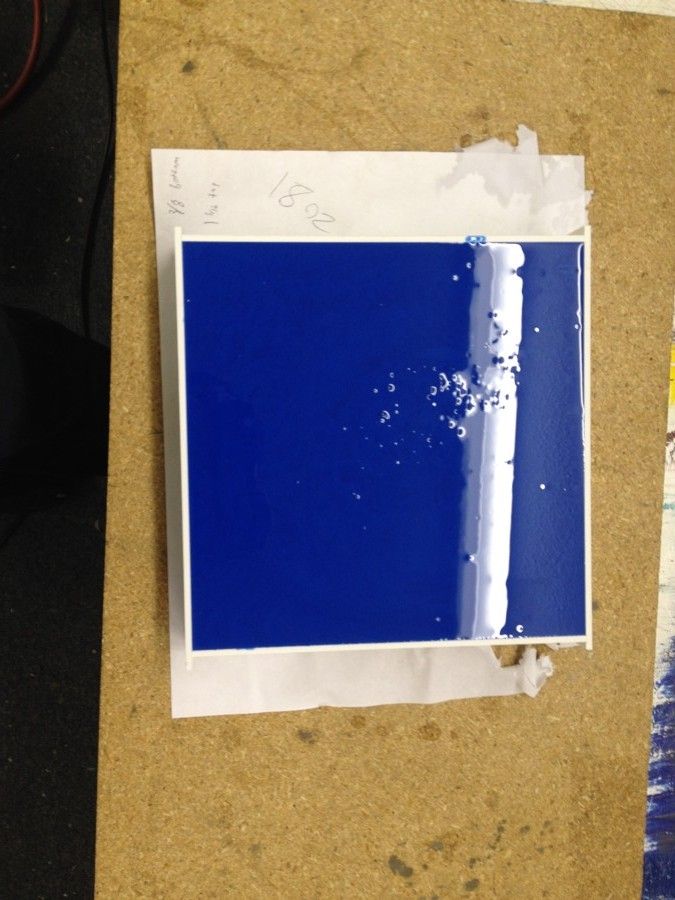
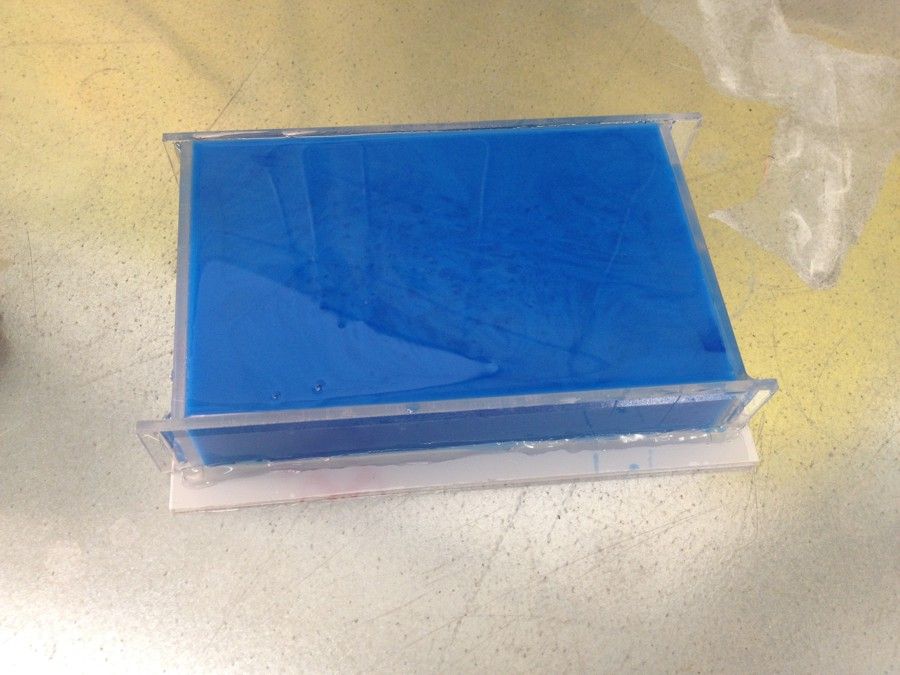
And then the silicone. I use Mold Star 30 platinum cure silicone. its very easy to use, and lasts for many pulls.
Image

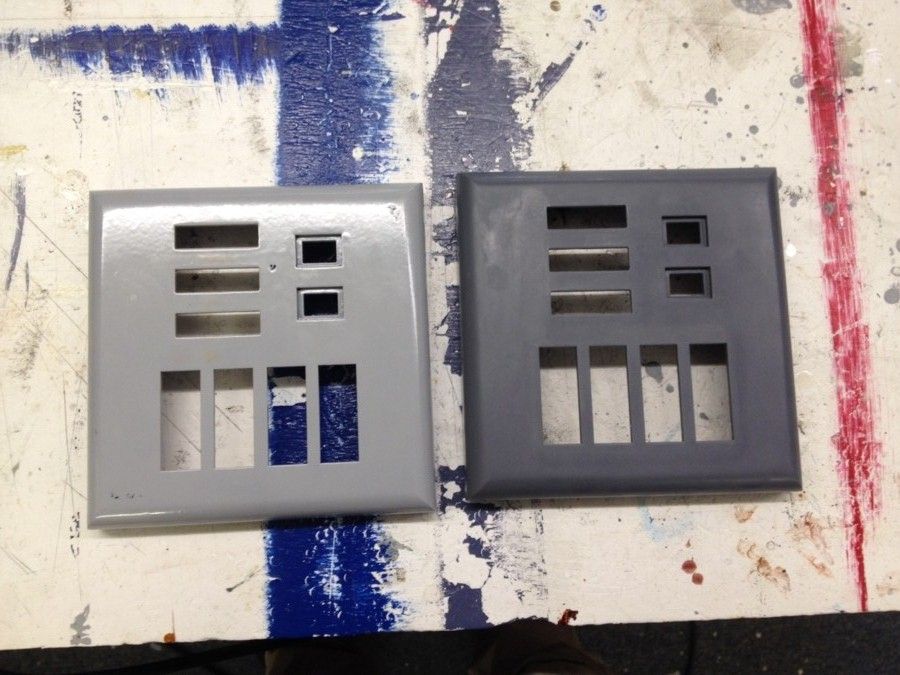
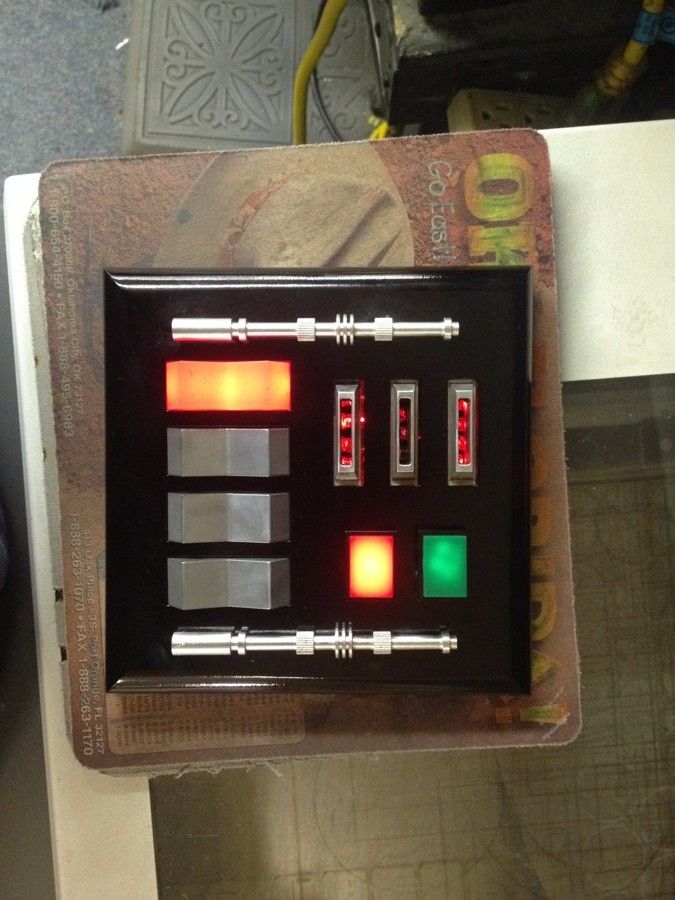
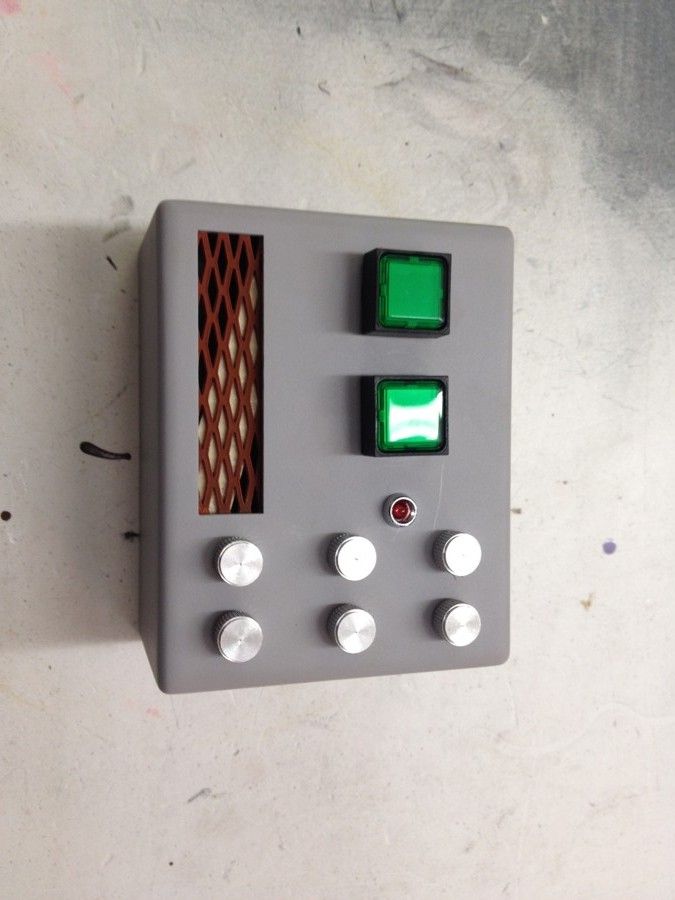
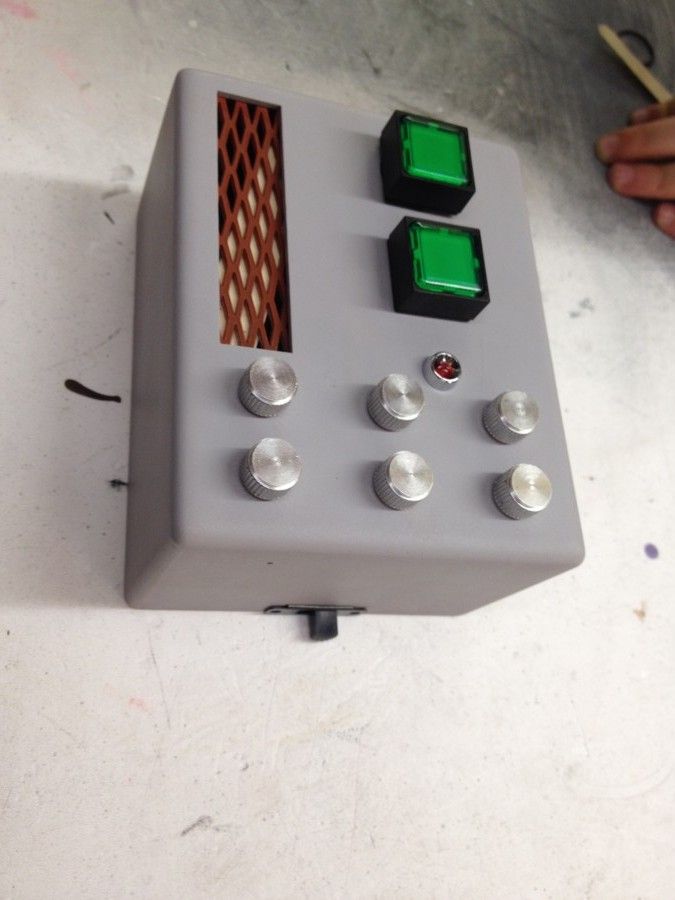
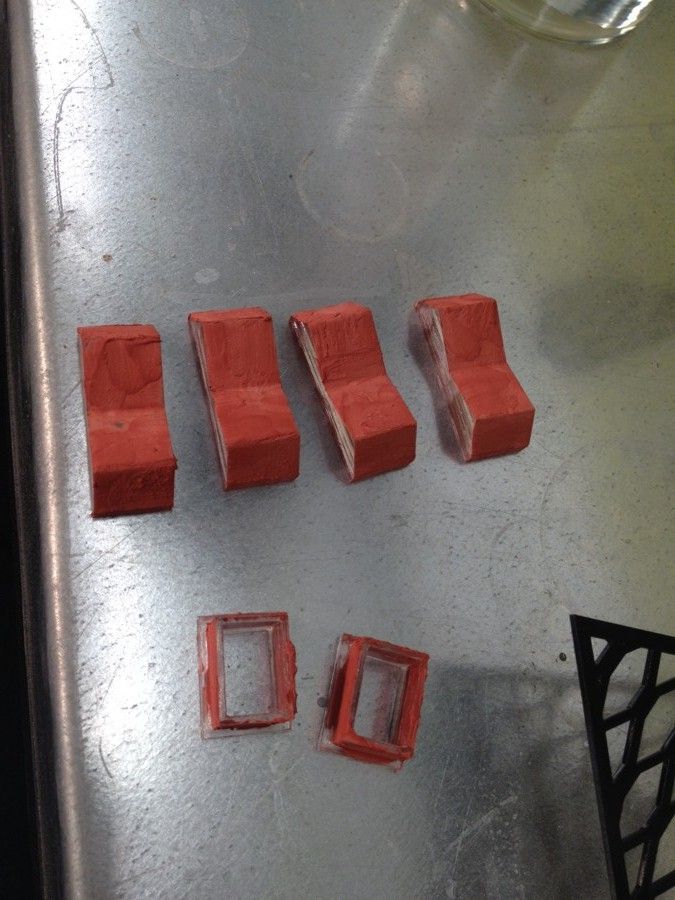
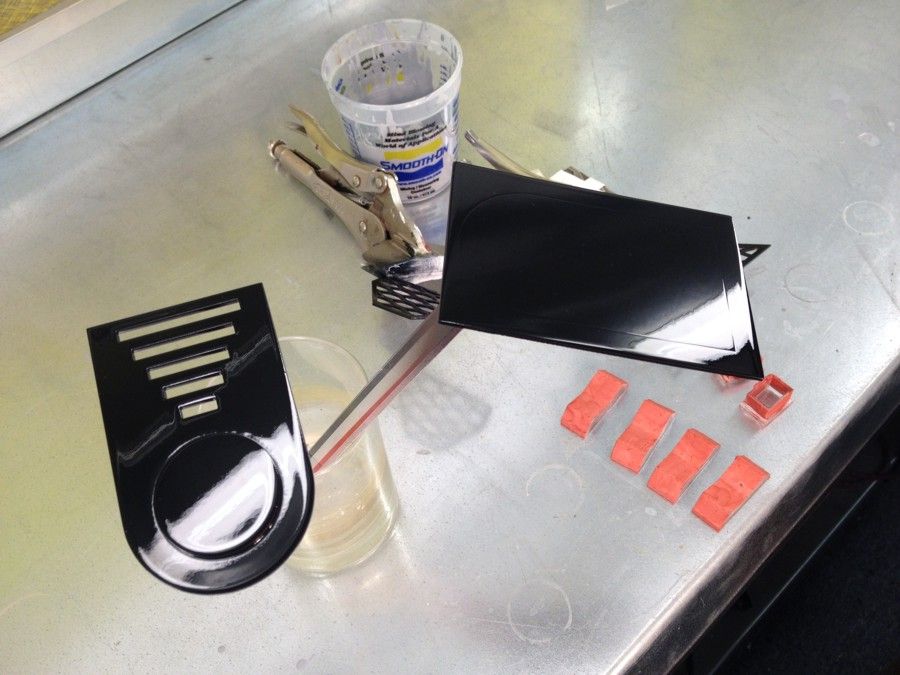
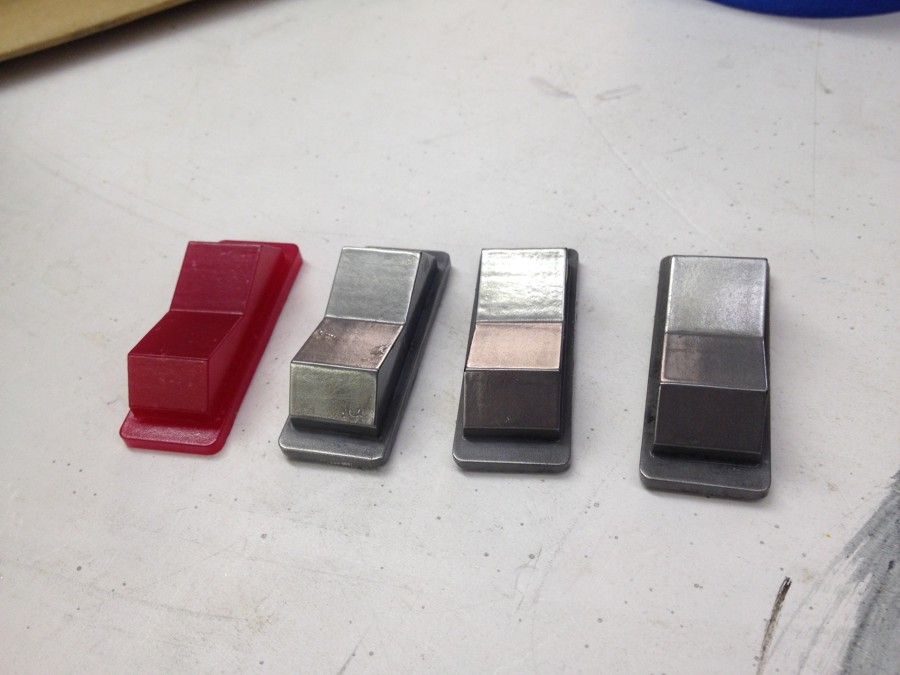
I did a transparent red one, and 3 cold cast aluminum ones. For those unaware of what cold cast means, you dust the mold with a metal powder, and then pour the resin in. Once cured, it will look like a dull gray, but it can be buffed and polished to a shine, and look very close to metal. The results are good enough for the premier, and much faster than waiting for paint to dry.
Image

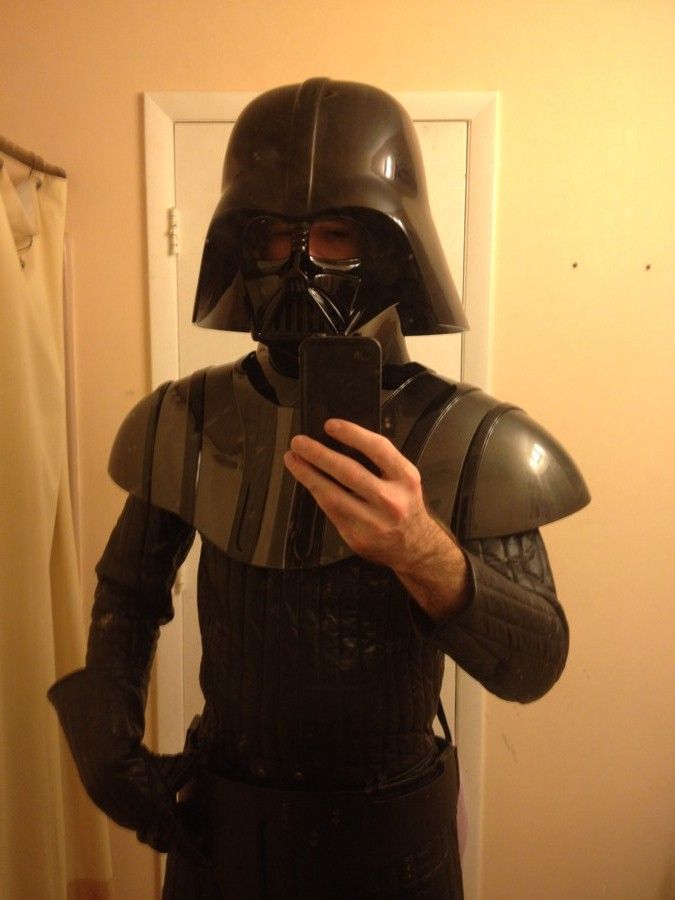
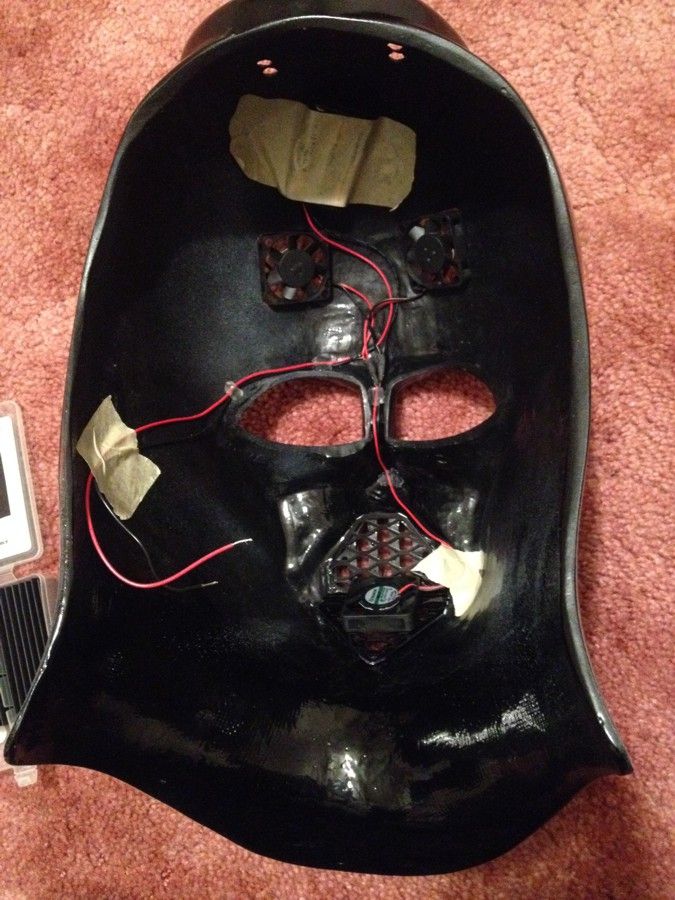
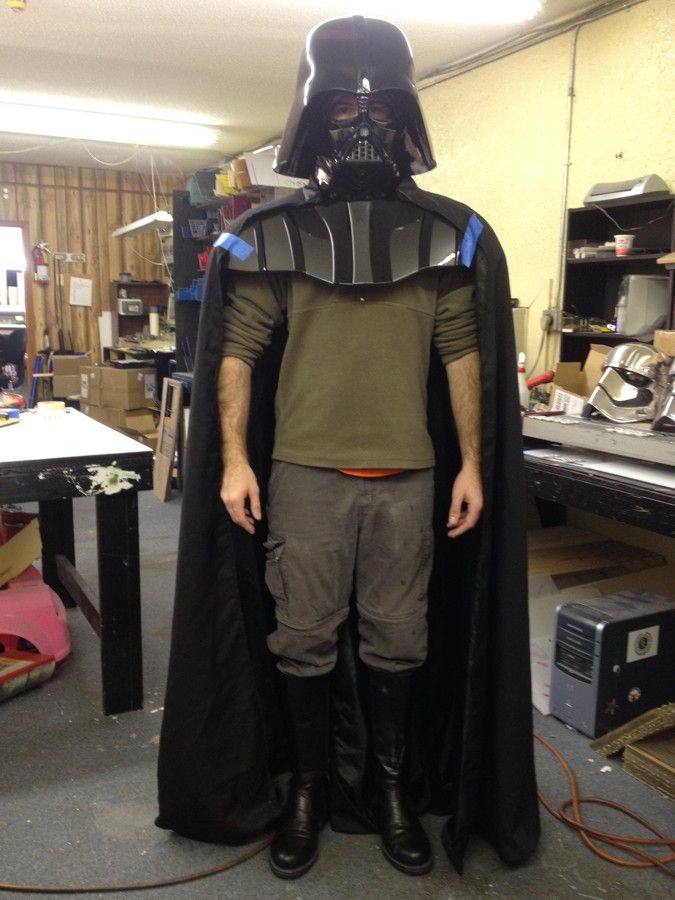
I spent most of my evening wiring fans for the inside of the mask. 1 fan blowing air in, through the mouth, and 2 fans blowing hot air out of the top. It runs off of 3 AAA batteries. I need to pick up a potentiometer tonight, so that I can adjust the speed. Right now at full speed, It is a wind tunnel, and I can't hear anything outside.
Image

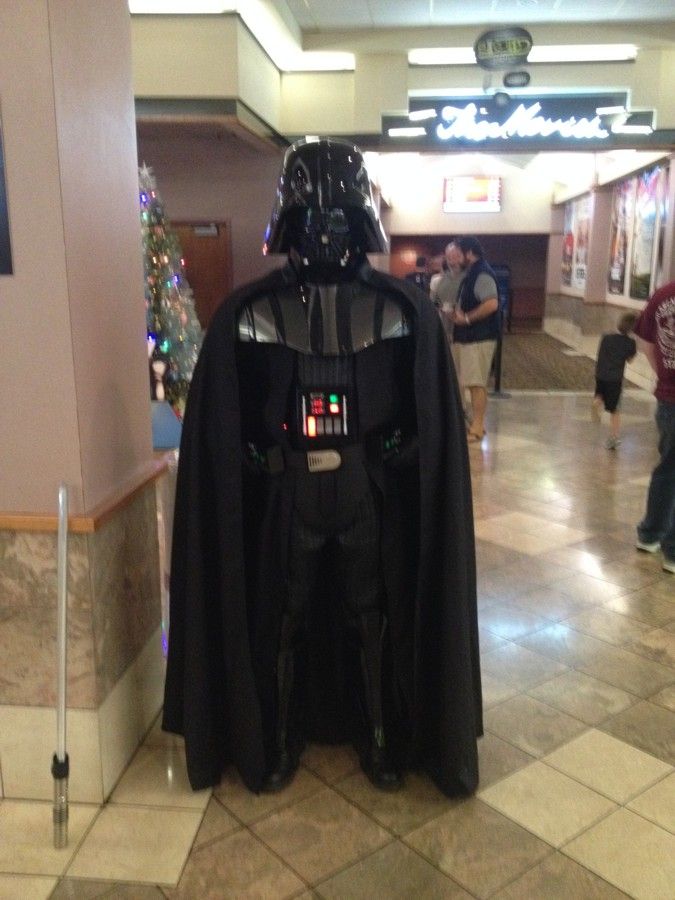
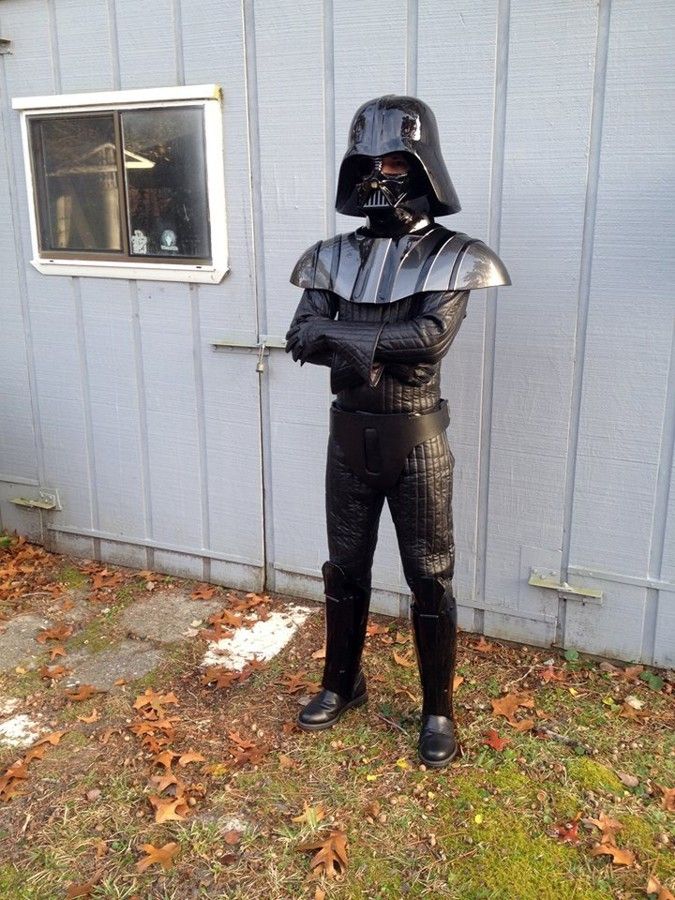
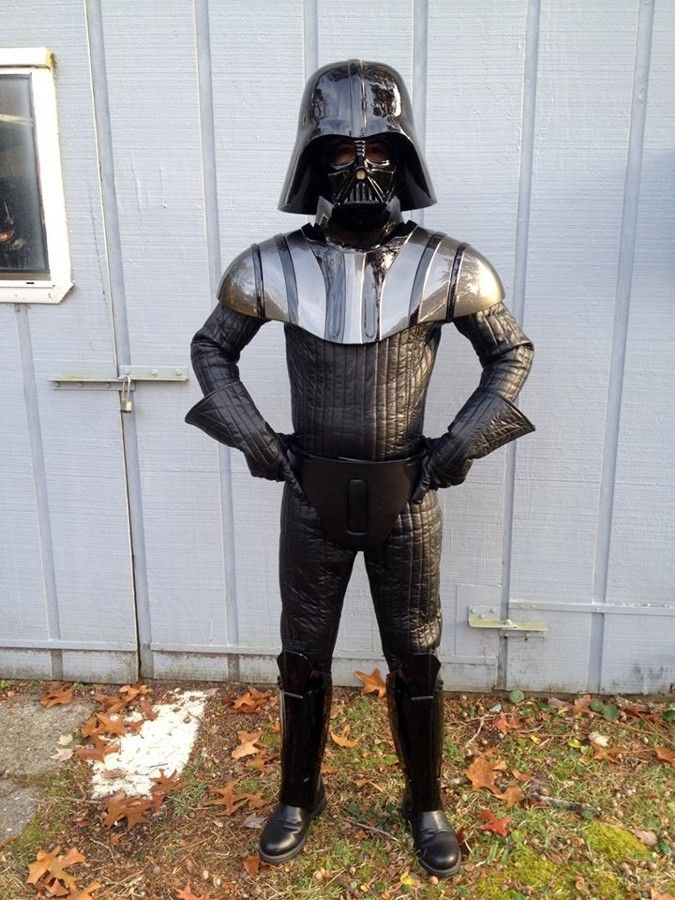
I am also using a CP cape from a friend. He is putting an OT Vader together, but since he doesn't have it complete yet, he is letting me borrow it for the weekend. I sewed the correct trouser clips in place, and they work beautifully.
Image

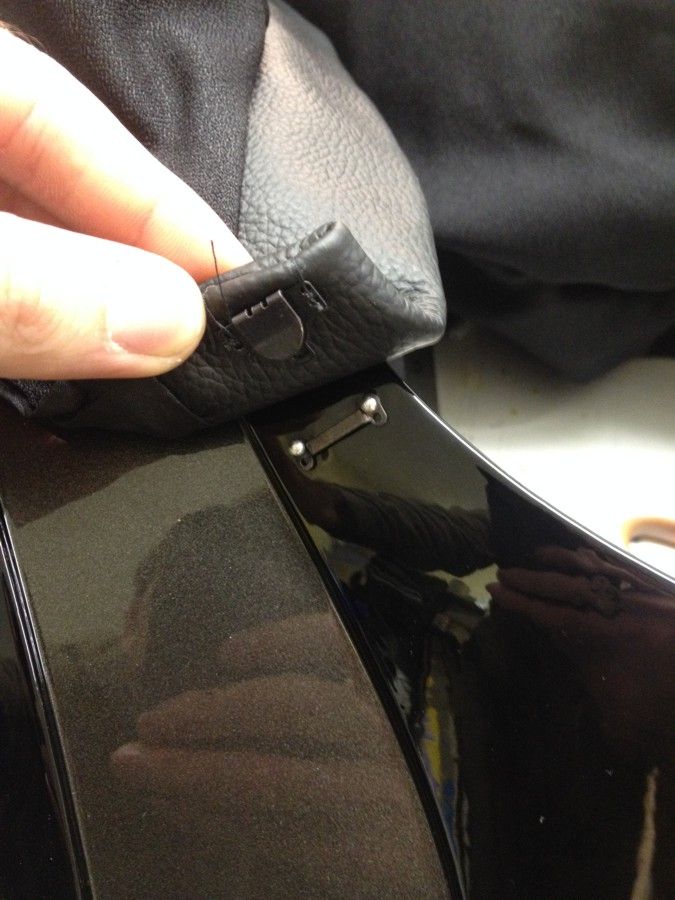
I also had the bottom hemmed to be the proper length for me. I think it is pretty close to perfect. I still need to adjust the way it sits on the armor though.
Image

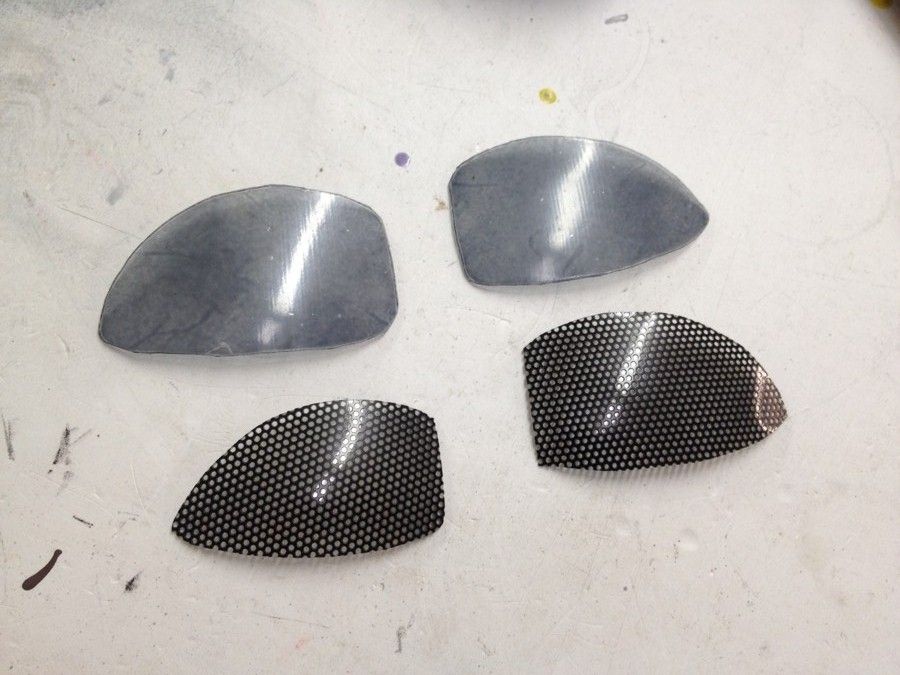
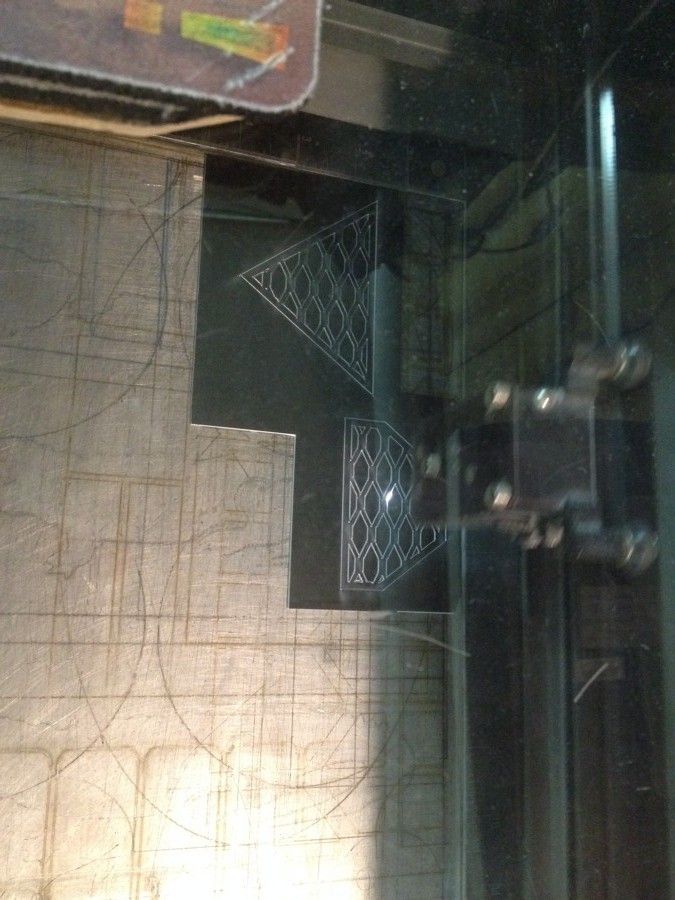
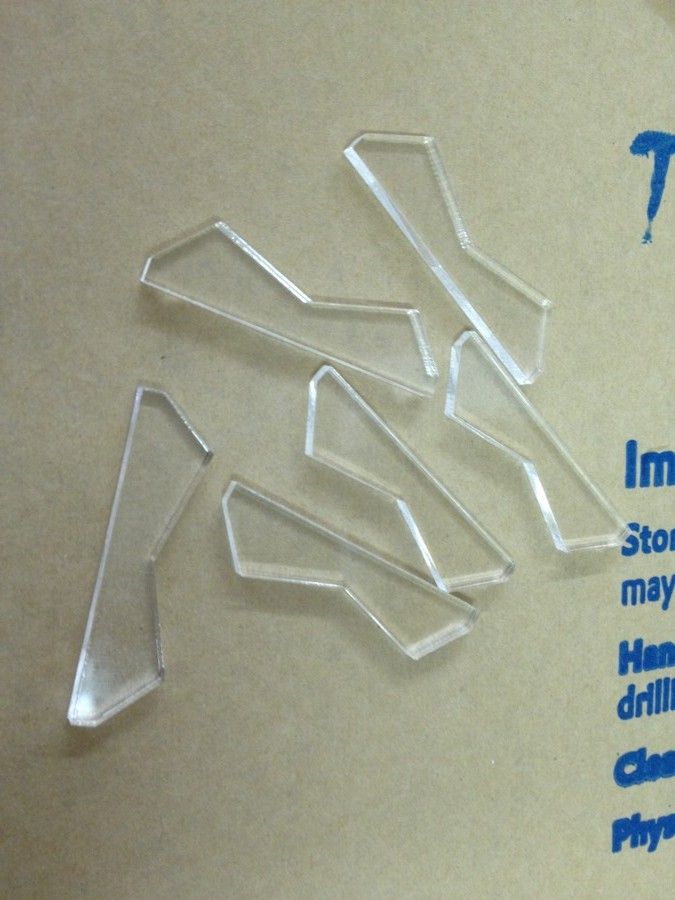
One last pic for the afternoon. I shaped my own eyes from some 1/16" clear acrylic, and sprayed a light coat of VHT Nightshade. I felt that it still wasn't dark enough, but didn't want it to start getting fuzzy, so I did a separate set, and applied some perforated vinyl to them. I can see perfectly out, but visibility coming in will be close to impossible. This is the material that is used for windows on vehicle wraps.
Image
by JUSTINIAN
Mon Dec 14, 2015 4:19 pm
Forum: Public Access Board
Topic: Building an ROTS Vader
Replies: 45
Views: 83064

Re: Building an ROTS Vader

Triple post update!

I found the best pic of the mesh from the screen used boxes, and traced them in Corel iDraw. The laser cut them out of plastic. Here they are in primer.
Image

I did the same method for the belt boxes as I did the chest box. Here they are built, routed and sanded smooth. Aluminum Knobs from Fenix Props, buttons special ordered from the UK (insanely expensive for just 4 buttons).
Image
Image

I'll be doing the final coat of paint and molding the rocker switches later today. Then a final assembly on them tomorrow. Then a test with everything on Wednesday. It's going to be very close, but I'll have everything done for Thursday night.
by JUSTINIAN
Sun Dec 13, 2015 8:34 pm
Forum: Public Access Board
Topic: Building an ROTS Vader
Replies: 45
Views: 83064

Re: Building an ROTS Vader

A very productive weekend!

I did a test fit with all of my completed parts. I need to adjust the chest, so that it will stay in place. I'm hoping that the cape will help with most of that.
Image
Image
Image

I got some great progress on the chest box done too. This is the front face all cut out of 1/8" acrylic.
Image

I added a few more layers to build up the thickness, and then applied body filler to the outside, so that I could and the edges smooth.
Image

Once I sanded the edges I used my table router with a 1/2" corner radius to rout the edge.
Image

The rocker switches are also complete.
Image

Everything all together. I will use rods and coinslots from Fenix Props for the premier. I will make my own for better accuracy later.
Image
Image
by JUSTINIAN
Fri Dec 11, 2015 8:34 pm
Forum: Public Access Board
Topic: Building an ROTS Vader
Replies: 45
Views: 83064

Re: Building an ROTS Vader

Thanks Jason.

I did my first suit up with the bodysuit, armor and helmet. Overall very pleased.
Image

I also cleaned up the shins as best as I could with the amount of time that I have left. They are not perfect, but they are black and shiny, so I am hoping that no one will notice, once the rest of the suit is on. I will make a new set after the premier.
Image

I also started cutting out some of the misc parts. Here is the mesh for the helmet, on the laser cutter.
Image

I cut out the a bunch of pieces for the rocker switches. 1/8" acrylic cuts best for me, so it's mostly what I use
Image

Then glued the layers together. This gives me an exact shape, that will only need minor cleanup.
Image

Spot filler is applied to the edges, and left to dry overnight.
Image

The belt buckle is also cut out and painted with a high gloss black.
Image

Still need to cut the base of the chest box and the belt boxes. Hopefully by the end of the weekend I will have Something ready to go into paint by Monday.
by JUSTINIAN
Thu Dec 10, 2015 6:17 pm
Forum: Public Access Board
Topic: Building an ROTS Vader
Replies: 45
Views: 83064

Re: Building an ROTS Vader

I spent the past two days researching the belt and chest boxes. Here is the design I came up with for both. Used pics of screen used pieces, so it should be pretty darn accurate.

Image

Image

I'll start cutting them out later tonight, and hopefully have something to start painting tomorrow.
by JUSTINIAN
Tue Dec 08, 2015 8:14 pm
Forum: Public Access Board
Topic: Building an ROTS Vader
Replies: 45
Views: 83064

Re: Building an ROTS Vader

Thanks guys. I hope to have more progress tomorrow.
by JUSTINIAN
Tue Dec 08, 2015 2:20 pm
Forum: Public Access Board
Topic: Building an ROTS Vader
Replies: 45
Views: 83064

Re: Building an ROTS Vader

Another update. The shoulder armor has been painted. I used Dupli-Color Graphite Mica Metallic. It is a perfect match!
Image

I painted all of the parts black and did one wet clear coat. I know that there would be some imperfections, and I wouldn't be able to see them until I had a nice high gloss on all of the parts. After the paint had cured for the weekend, I had my son help me do the wet sanding. He enjoyed it.
Image
Image
Image

Once that was finished, I washed everything, and dried it. Then did 6 coats of clear on all of the parts. Needless to say, everything is super shiny and smooth now.
Image
Image
Image
Image

I'll let everything dry for a day or two, while I begin to work on the other parts.
by JUSTINIAN
Mon Dec 07, 2015 10:06 am
Forum: Public Access Board
Topic: Building an ROTS Vader
Replies: 45
Views: 83064

Re: Building an ROTS Vader

Thanks Jason. Raw Phasma helmets are $185 plush shipping.

Vader has always been something I wanted to build. I did a very cheap one in high school. Once you have the desire to do it, it's very hard to get rid of.