Page 1 of 1
ATA Helmet help in Charleston
Posted: Sun Jan 17, 2016 10:34 pm
by hingoosi
Hey guys,
I'm having a terrible time getting the ears right. Seriously on to the 3rd pair. Anyone in the the Charleston area that could give me a hand? Or gimmie a look see and tell me what I'm doing wrong?
Ian
Re: ATA Helmet help in Charleston
Posted: Mon Jan 18, 2016 11:58 am
by JeffMiller
Post some pics. There are a few of us with ATA helmets. The helmet itself is complicated...
Re: ATA Helmet help in Charleston
Posted: Mon Jan 18, 2016 10:59 pm
by hingoosi
I will get them!
Re: ATA Helmet help in Charleston
Posted: Tue Jan 19, 2016 9:08 am
by Cantina Security
Chris Gould should be in the charleston area. But, yes ear com covers are tricky. The mould lines are not close at all. Start well over a half inch away but follow the same curve. Take very small trimmings at a time. Mark only where the covers touch and sand away slightly in those spots.
Whitearmor.net is the place to search for build threads .
But as always post pics hear so we can help.
Re: ATA Helmet help in Charleston
Posted: Thu Jan 21, 2016 8:32 pm
by hingoosi
Re: ATA Helmet help in Charleston
Posted: Fri Jan 22, 2016 12:50 pm
by JeffMiller
Best way to do ears (for me) is to use a Dremel with a sanding barrel. Go slow, take off a bit, test fit, pencil in area to be sanded.
Re: ATA Helmet help in Charleston
Posted: Fri Jan 22, 2016 12:53 pm
by JeffMiller
http://www.whitearmor.net/forum/index.p ... r-Tutorial" onclick="window.open(this.href);return false;
My Helmet Ear Tutorial
Re: ATA Helmet help in Charleston
Posted: Fri Jan 22, 2016 12:53 pm
by JeffMiller
This isn't mine, it autocompleted that from the other forum thread
Re: ATA Helmet help in Charleston
Posted: Thu Mar 17, 2016 12:06 pm
by silverBoyd
Sorry for late reply on this. I just saw you were in Charleston-area. Where at exactly? I live on James Island.
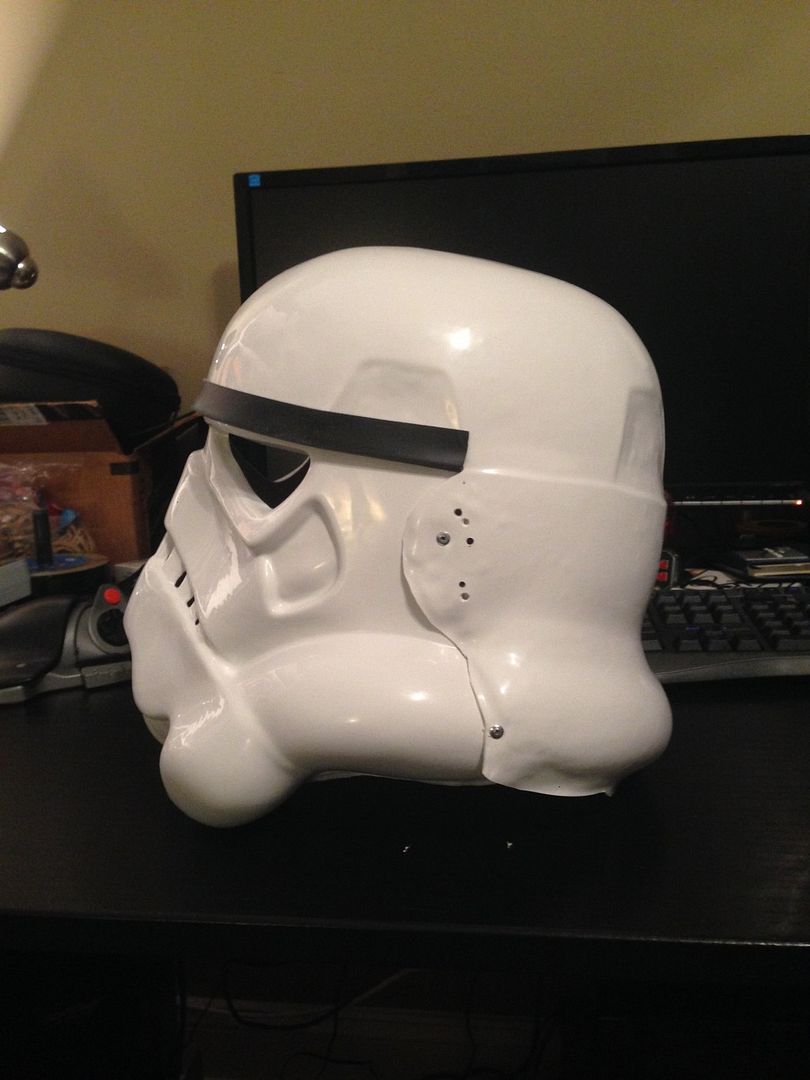
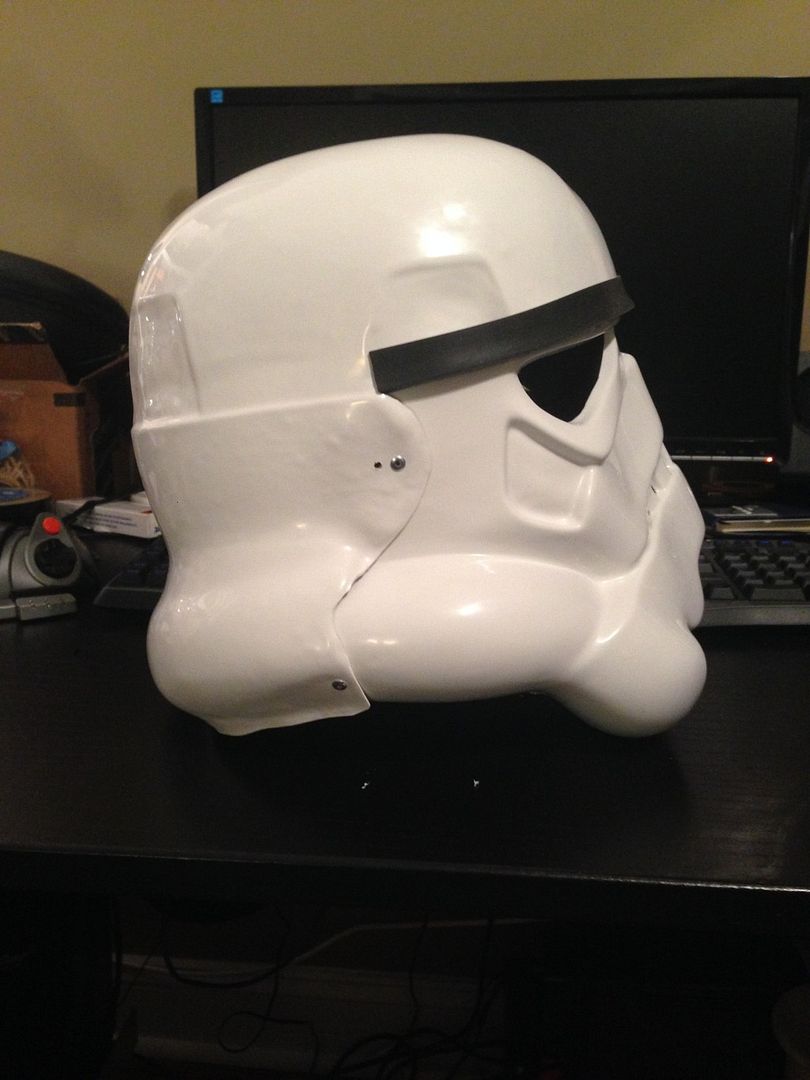
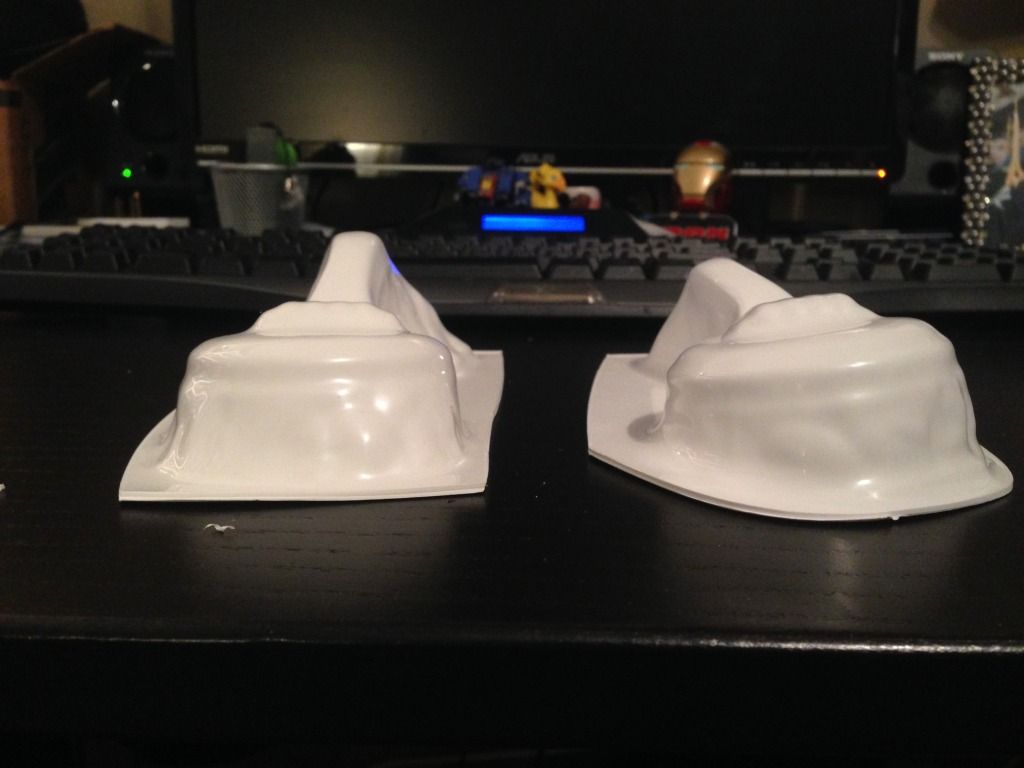
I assembled an ATA helmet last September for a friend. This was my 2nd Stormtrooper helmet build. The ear caps can be tricky on any helmet but you have to just go slow. Here are some pics of my ear cap assembly on the ATA I assembled last year.

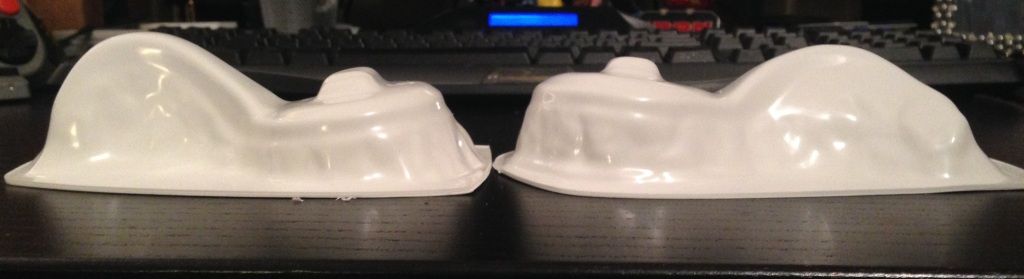
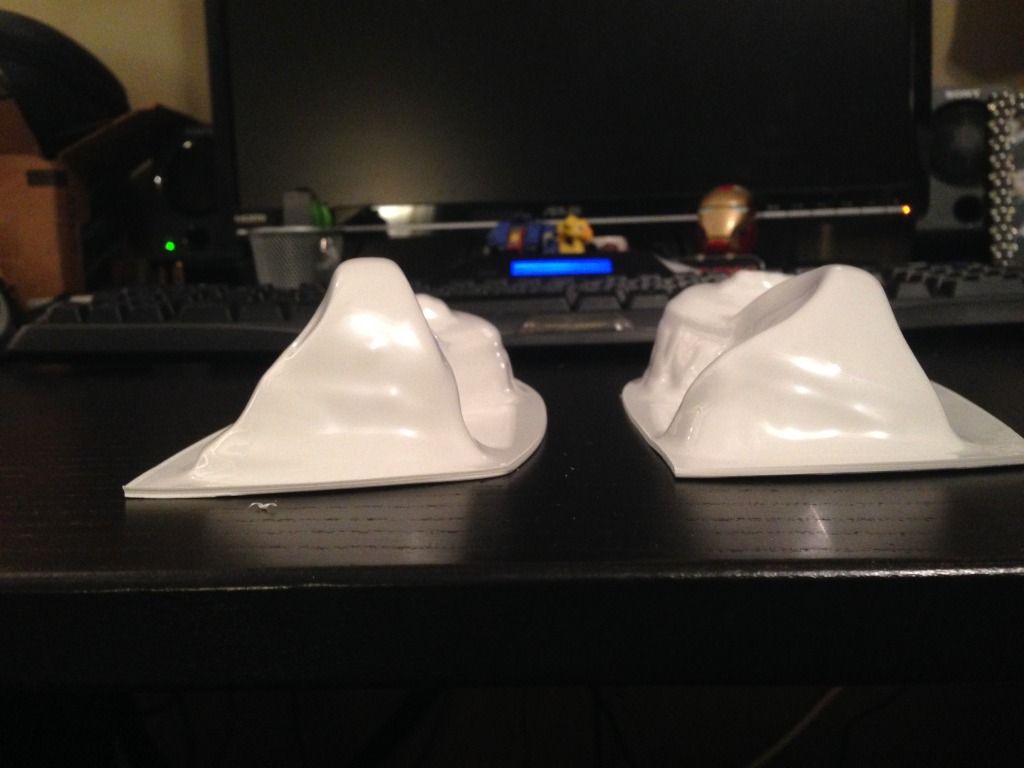
This was when i got the basic shape sanded down. The key to bringing it closer to the helmet is to sand off just a pinch at a time. The ear caps take the longest to get right. The middle curve is where you'll take the most off to get it to sit flush. Mark with a pencil where you need to take off a little bit at a time. Sand / Test Fit / Sand / Test Fit / ....
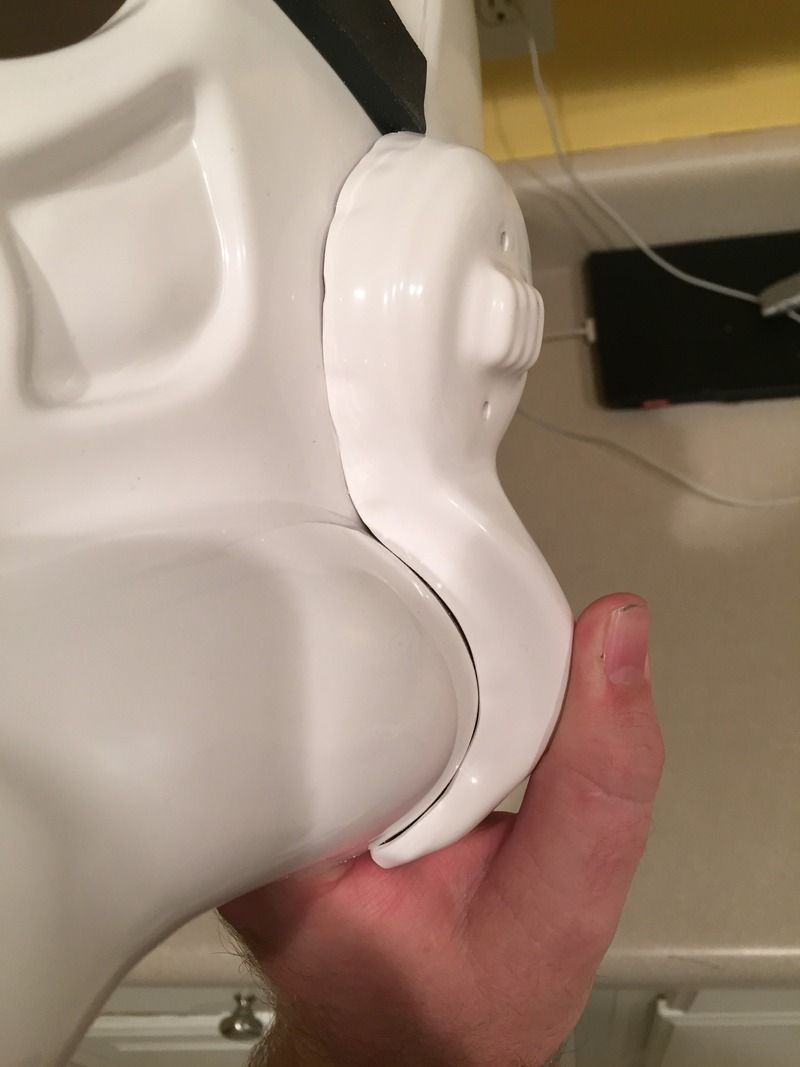
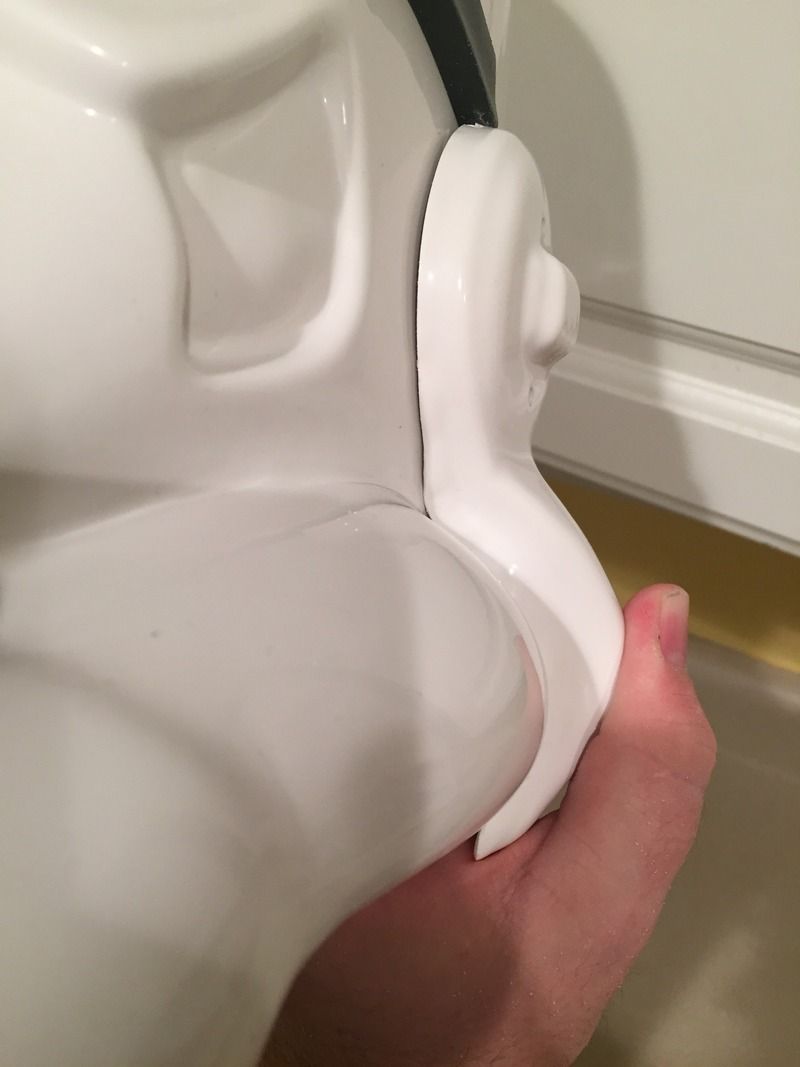
The ear caps look a little thick in the pics but this was as I was assembling and trimming. You can use the slight imprint int he mold as a guide as to how thin the ear caps need to be.
Remember, you can trim off a little at a time, but you can't put it back once it's off. A Dremel sanding wheel is the best tool for this job.
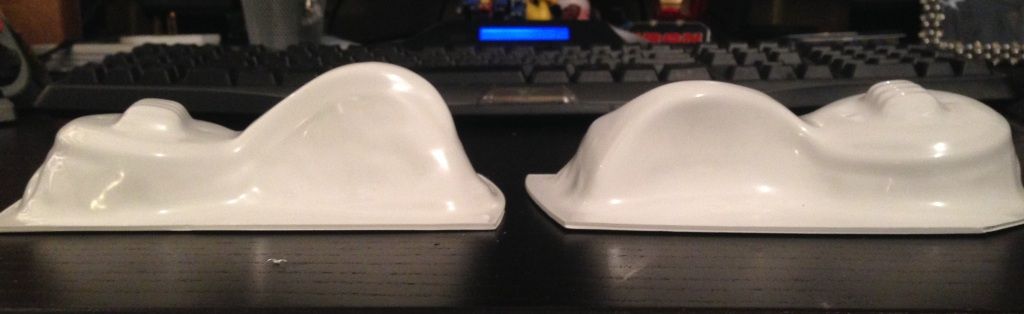
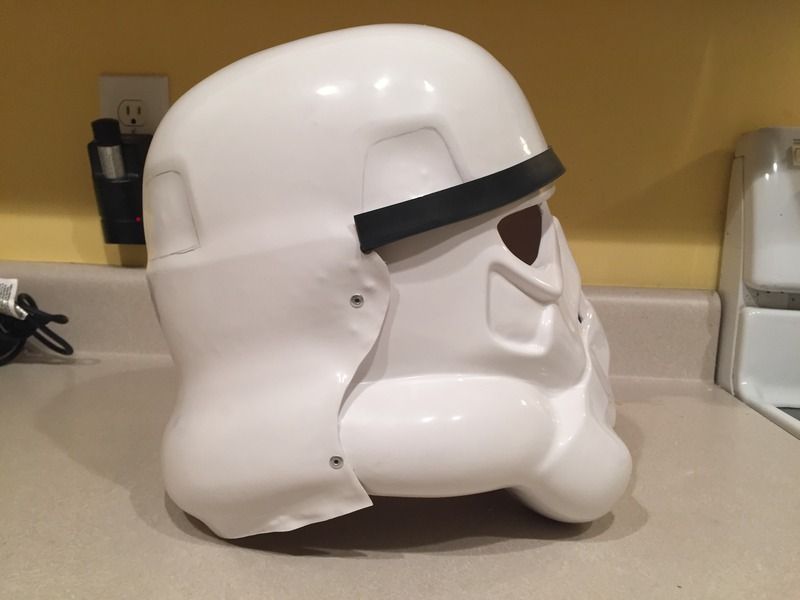
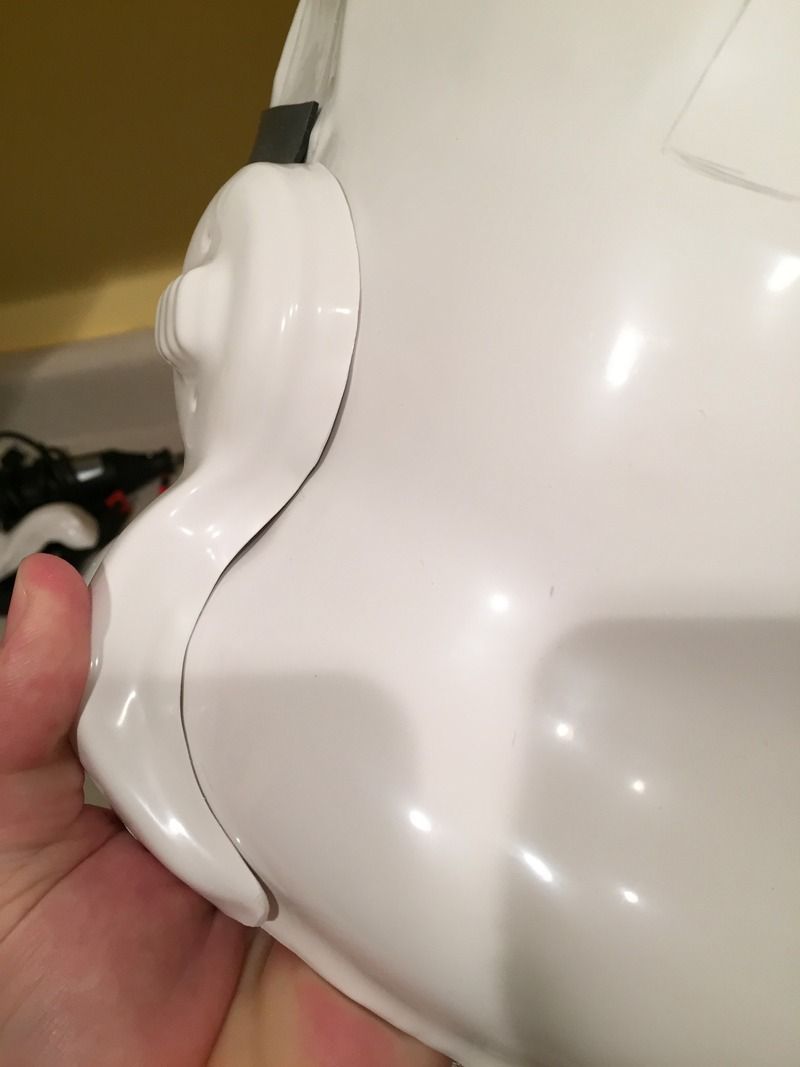
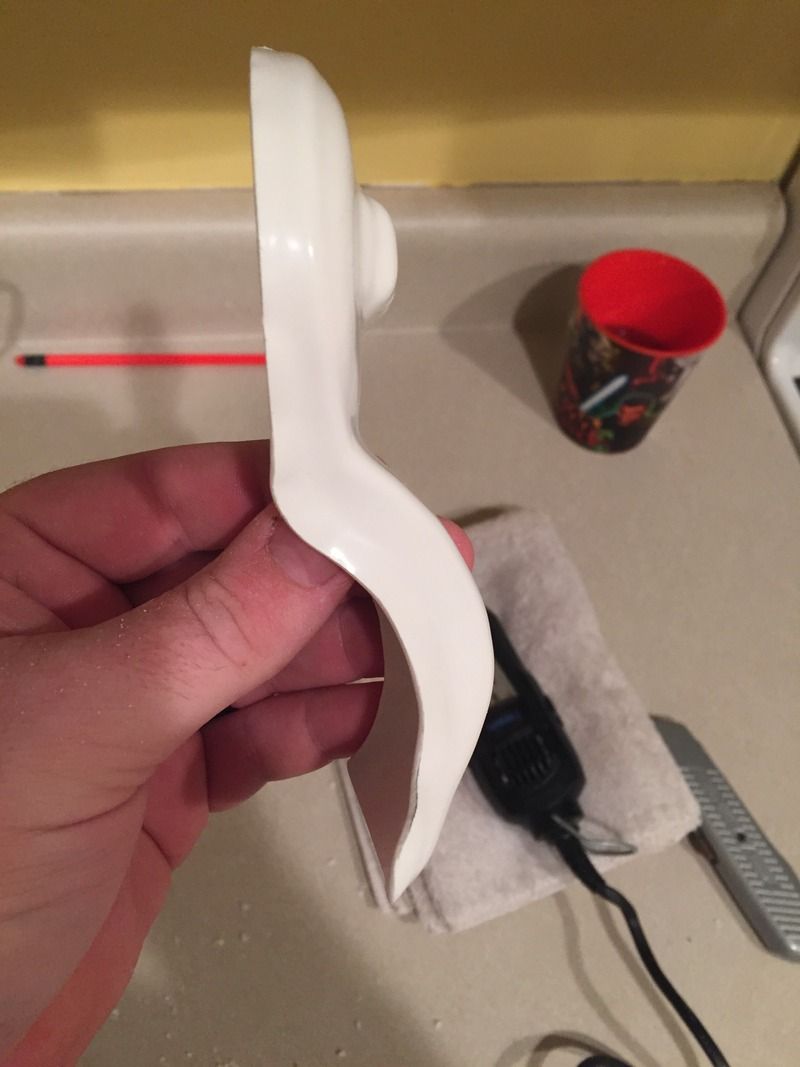
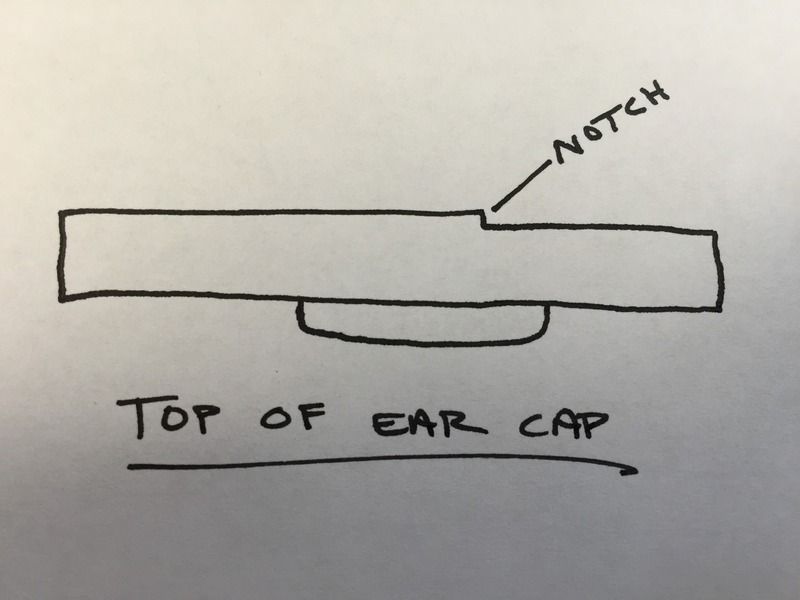
Another trick is the put a small notch at the top of the ear cap. Here's a picture looking down on top of ear cap to give you reference. This notch will fall where the helmet halves come together and will allow the ear cap to sit flush. You'll have to figure out where the ear placement will line up and also where the two halves meet the top of ear cap to figure out notch placement.
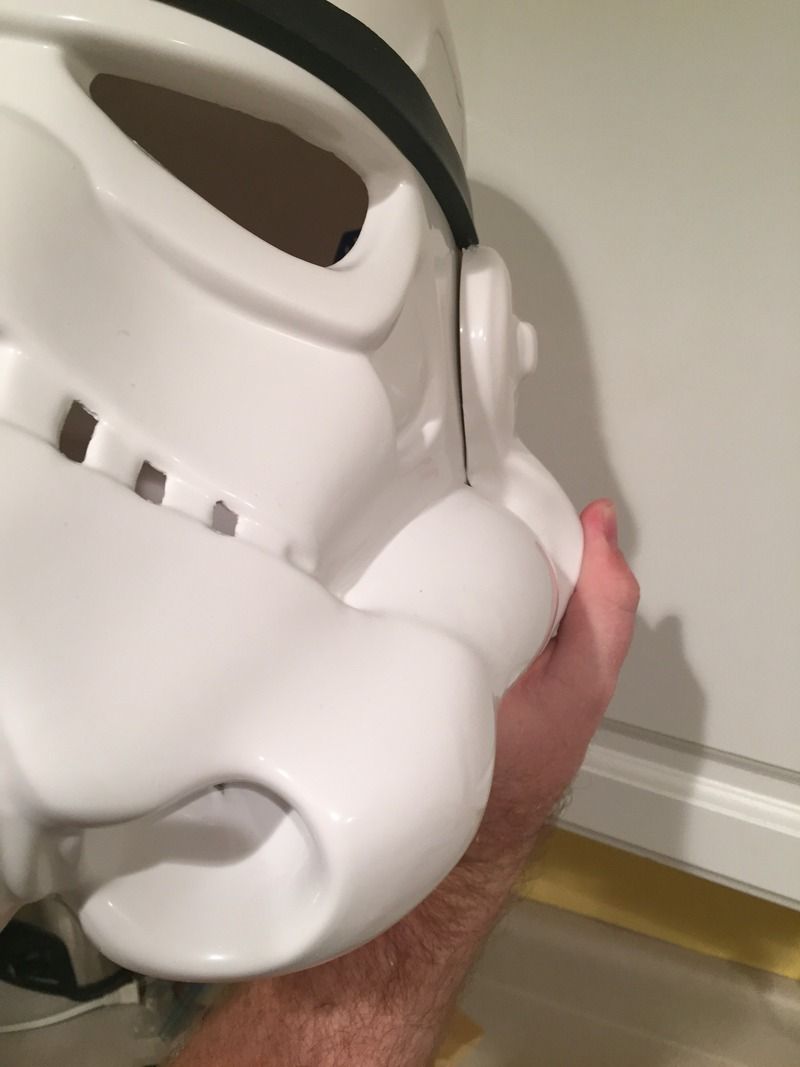
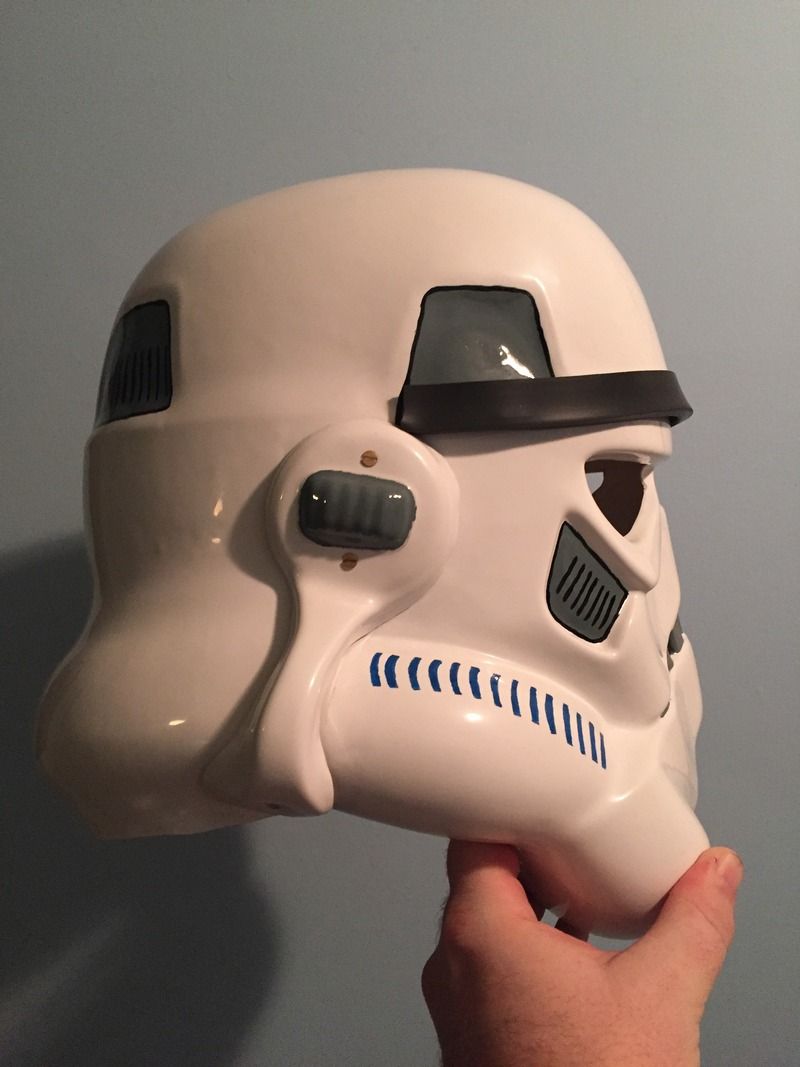
Here's a finished pic with all hand-painted details that I did. (minus the ear cap screws painted. I paint those with white nail polish because it dries hard and is harder for paint to chip off)
Re: ATA Helmet help in Charleston
Posted: Thu Mar 17, 2016 11:13 pm
by NegativeEleven
Don't know why I was recommended to you. I have one TK helmet, and it's the 2-piece Rubies I got at Halloween Express last November 1st for $25. I can talk when you decide to scratch build a mandalorian or put together an sc or ks scout helmet.